Getting started
Setup
Xmigrate can be run easily using the container image from xmigrate docker registry. We recommend to run the application with docker-compose file which is provided in the application repository. Also, consider changing the credentials used for PostgreSQL DB in the docker-compose.yaml file and provide the correct IP address of the server where xmigrate is getting set up in BASE_URL field. The IP address can be private or public but the servers which you want to migrate using xmigrate should have access to this IP. Here is an example,
BASE_URL: http://24.142.113.45:8000/api
Execute the below commands to start xmigrate application
git clone https://github.com/xmigrate/xmigrate.git
cd xmigrate
docker compose up -d
Execute the below command to see the logs from xmigrate app
docker compose logs -f app
Project
Once the application is up and running, the next step is to signup. After signup login to the application using the credentials. Now, we have to create a project to start the migration. We define the target cloud in this process. Below are the detailed steps with screenshots to create a project for each cloud provider,
AWS
There are two pre-requisites to migrate servers to AWS. We need an s3 bucket and access credentials to the AWS account with full permission to the bucket and permission to create roles and manage compute instances. This is for creating the network, compute resources and vmimport role in the target cloud during the migration. Follow the steps below to create a project for AWS migration;
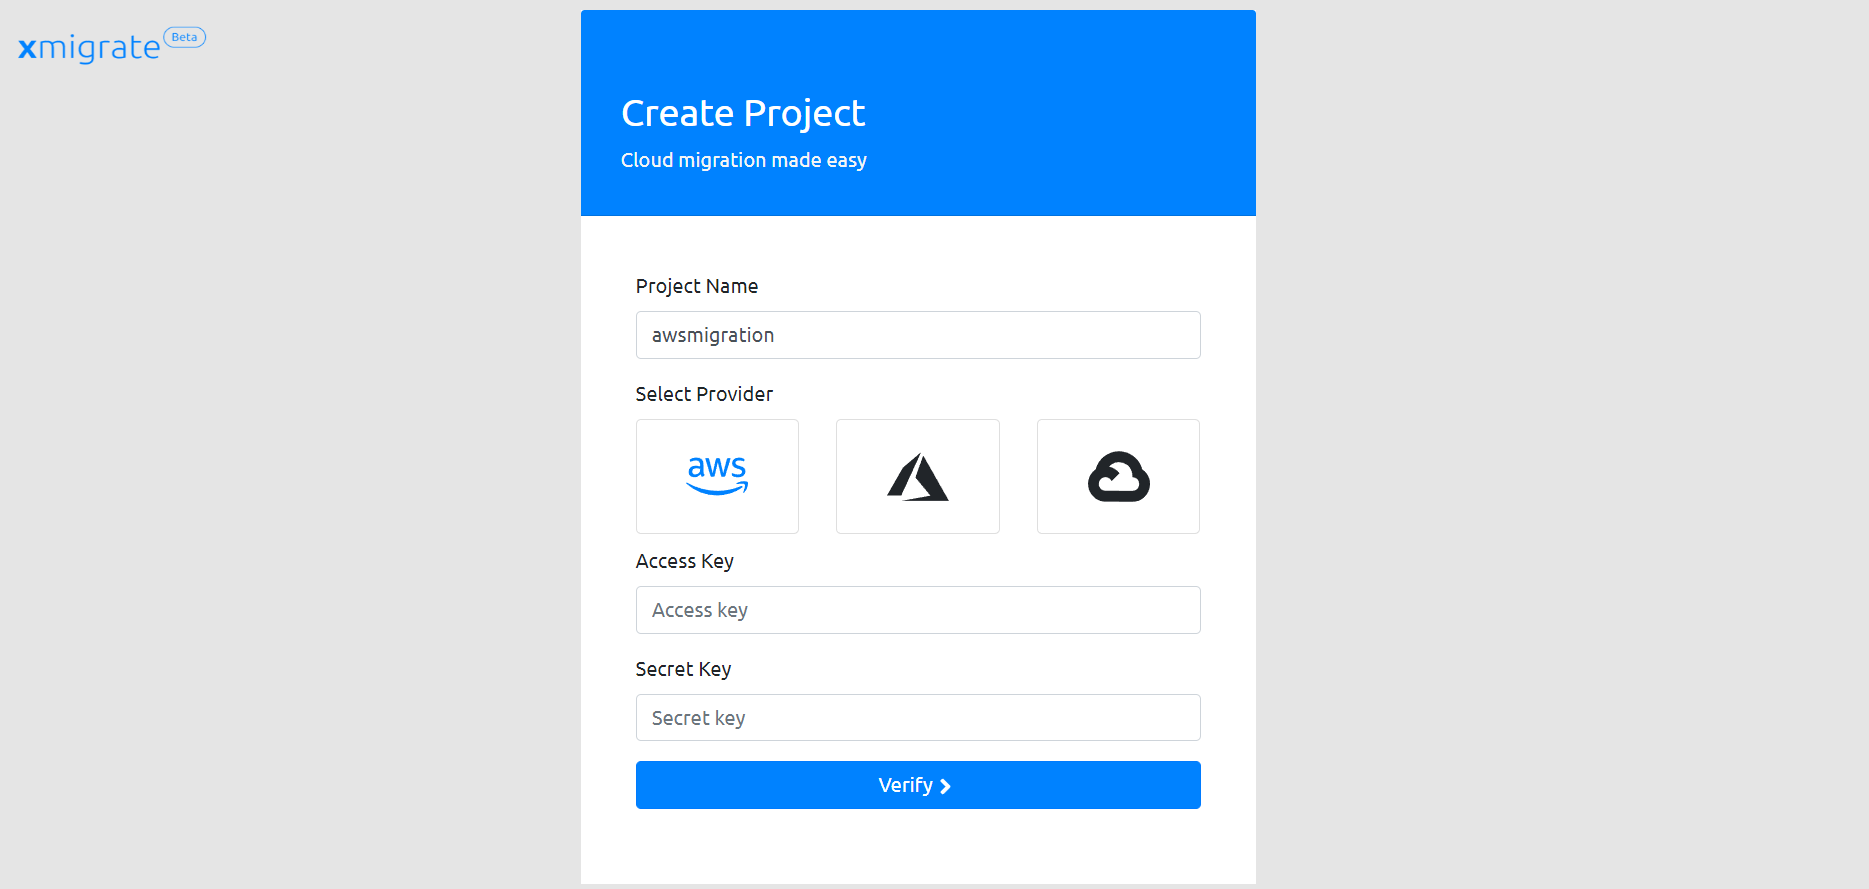
Give a project name and click on the AWS logo to set the target cloud to AWS. Then provide the access key and secret key of the target cloud account and click verify.
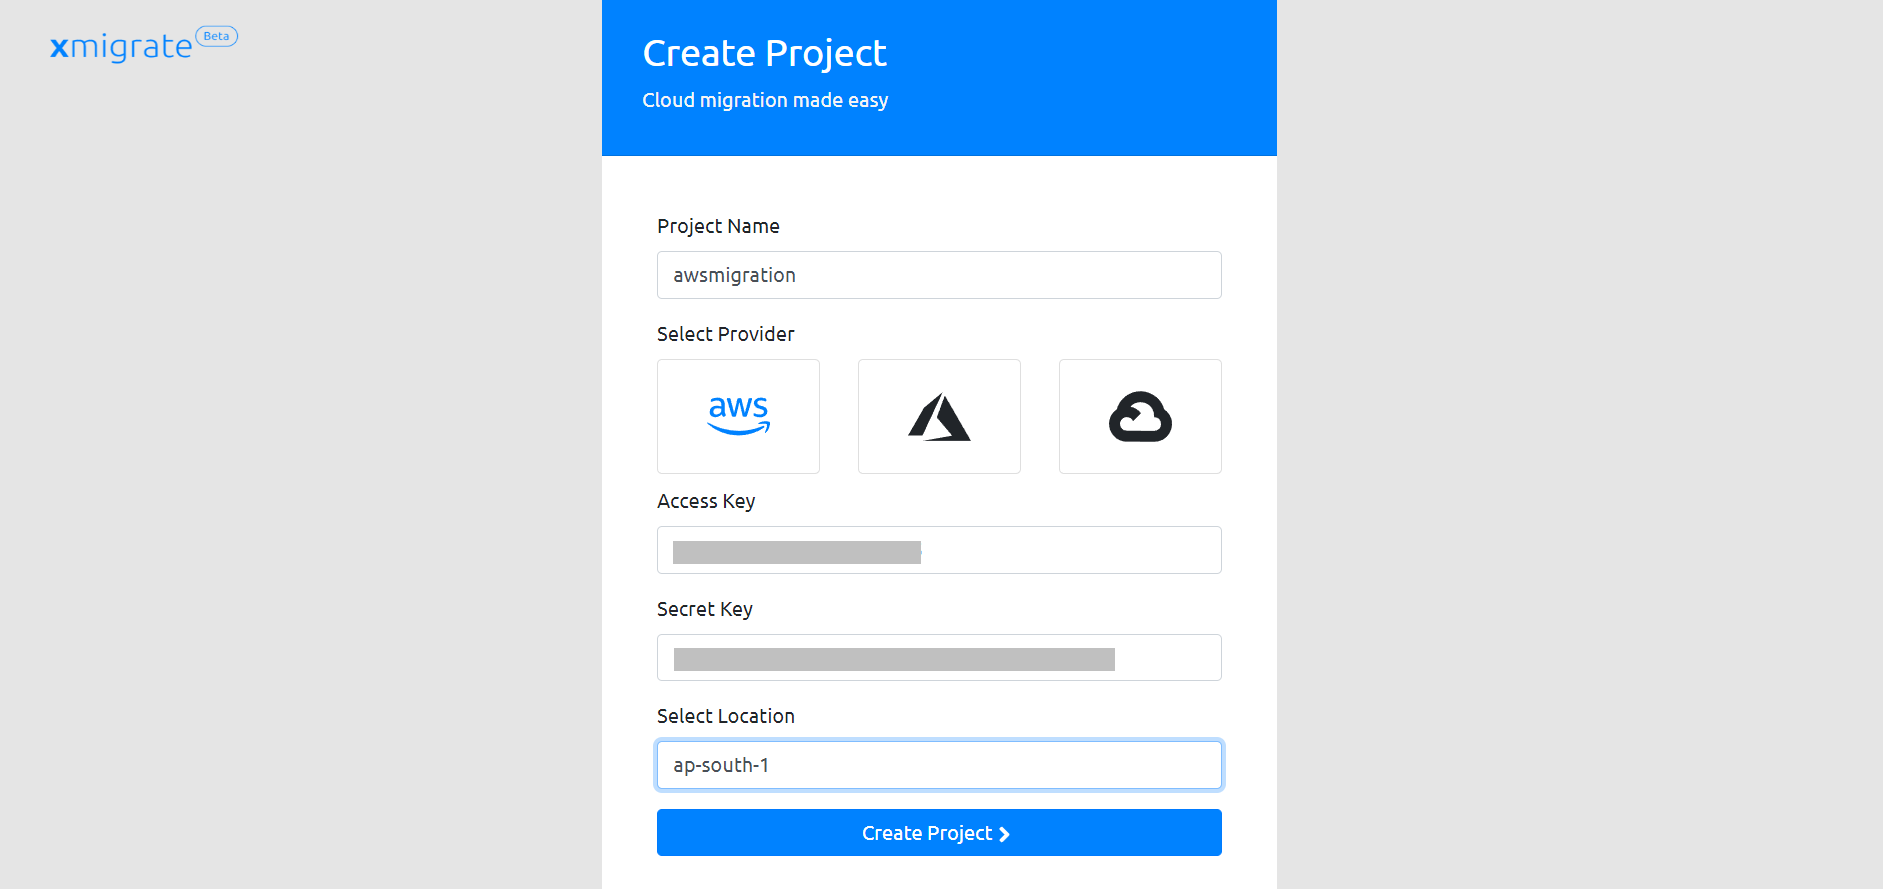
Now, you have to choose a region from the dropdown menu. The dropdown will be empty if the provided credentials are wrong. Make sure that the selected region and the region where the s3 bucket was created are the same.
Now, you have to enter the s3 bucket name and click on the save button to finish the project creation process.

Azure
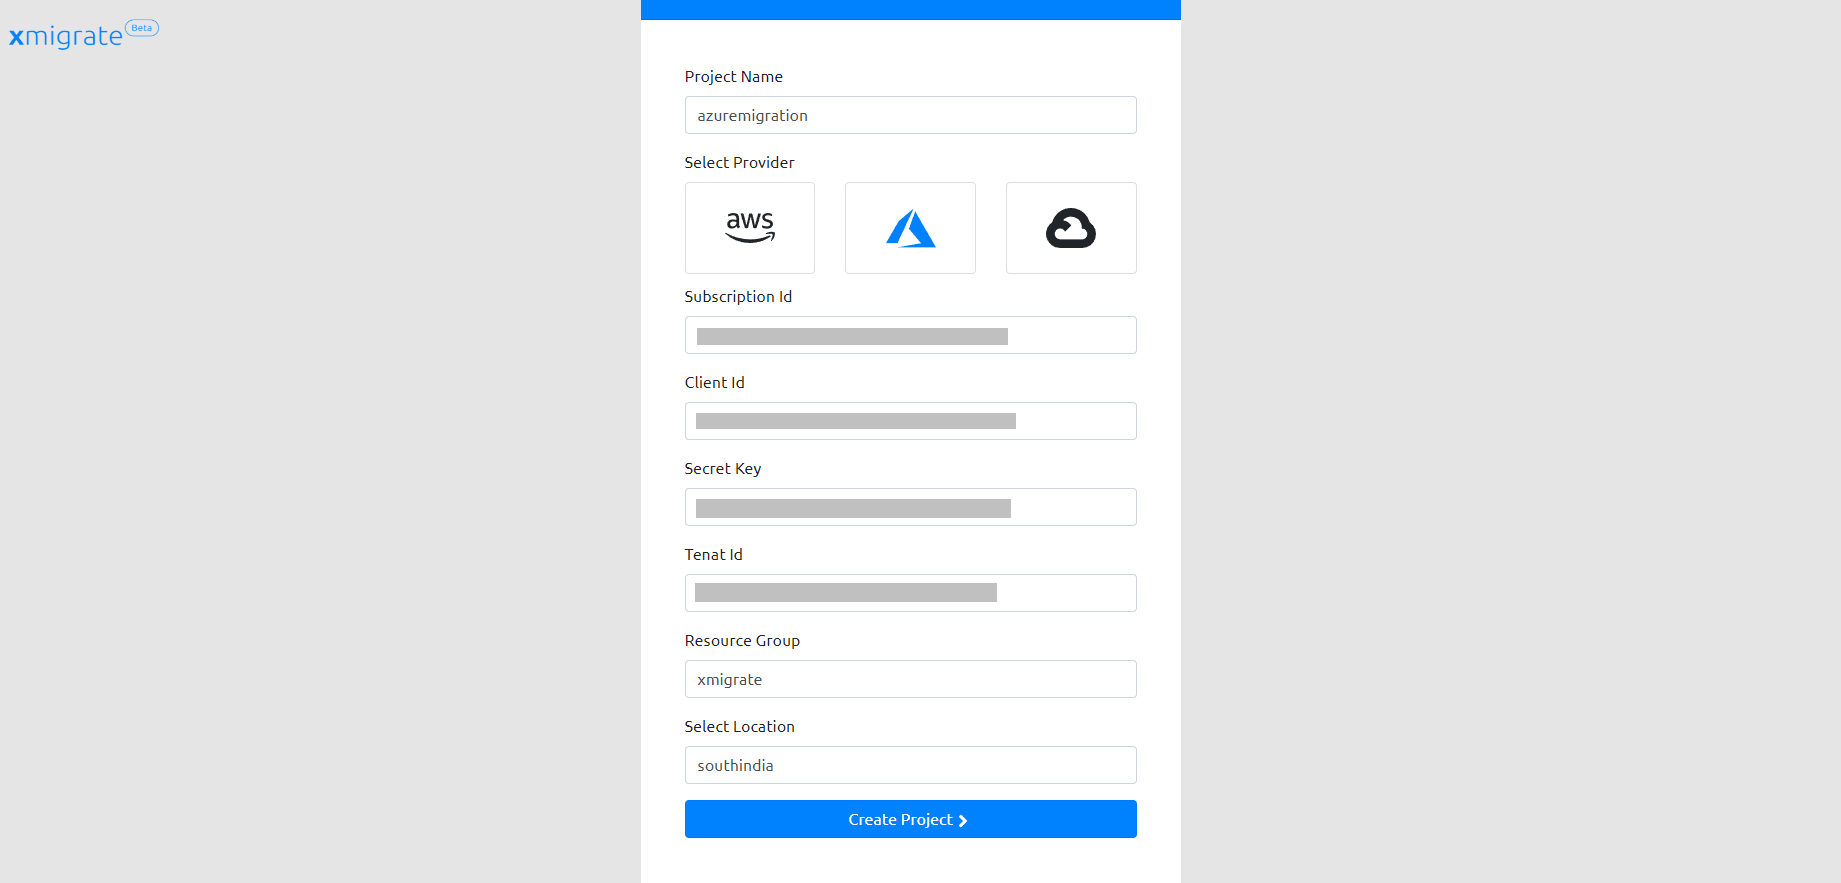
The project creation process for Azure migration is also very similar to AWS. We need a storage account container, access key for the storage account, and service principal credentials of Azure account. Follow the below steps to create a project for Azure migration.
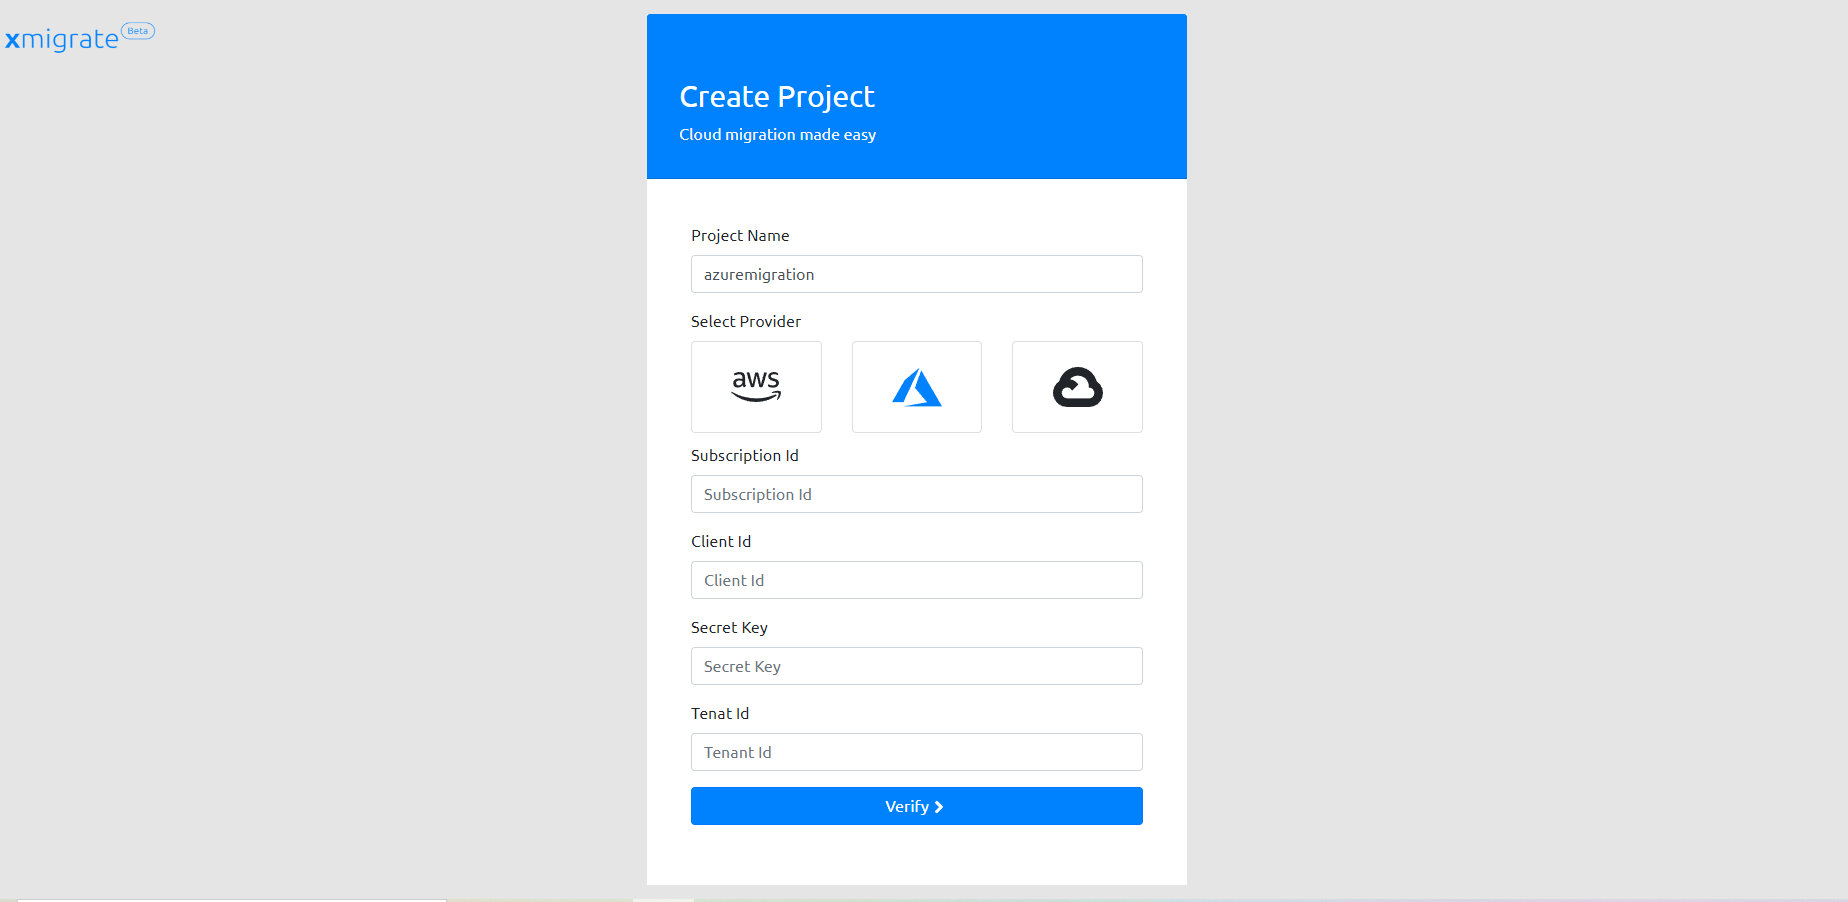
Give a project name and click on the Azure logo to set the target cloud to Azure. Then provide the service principal credentials of the Azure account and click verify.
Now, you have to enter a resource group name and select the region. If a resource group of the name you entered does not exist, it will be created. The best practice should be to use a resource group that does not exist already. The region you select should be the same as the region of the storage account.
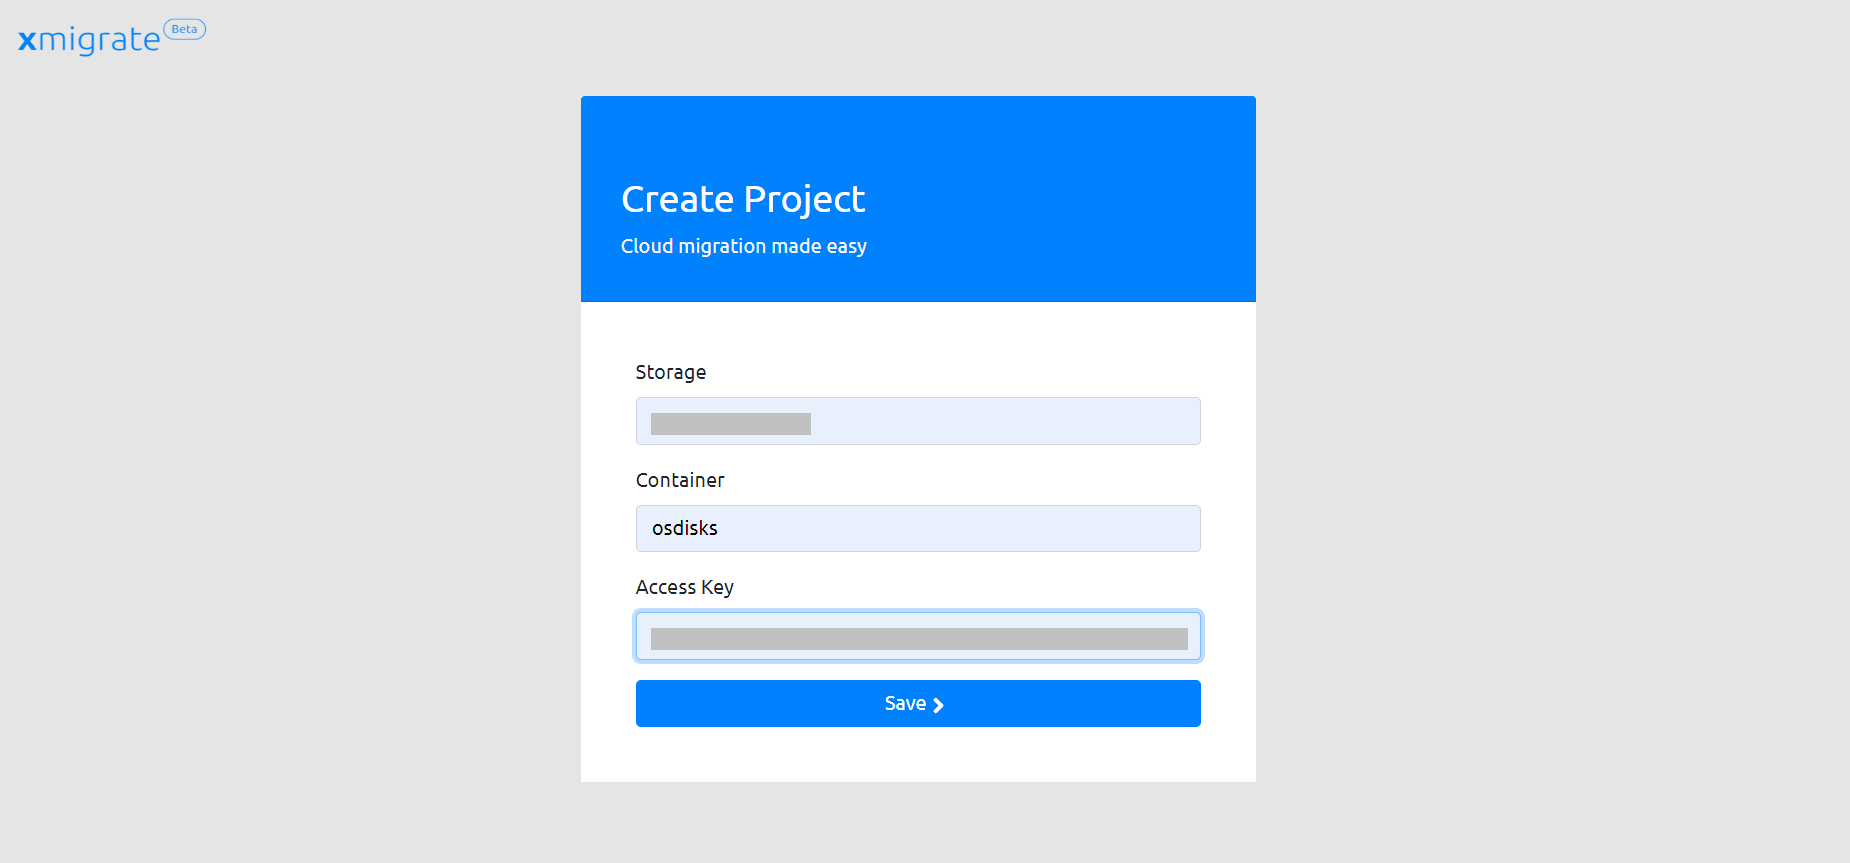
In this window you have to enter the storage account details. Enter the storage account name, container name, and access key and then press the save button to create the project.
GCP
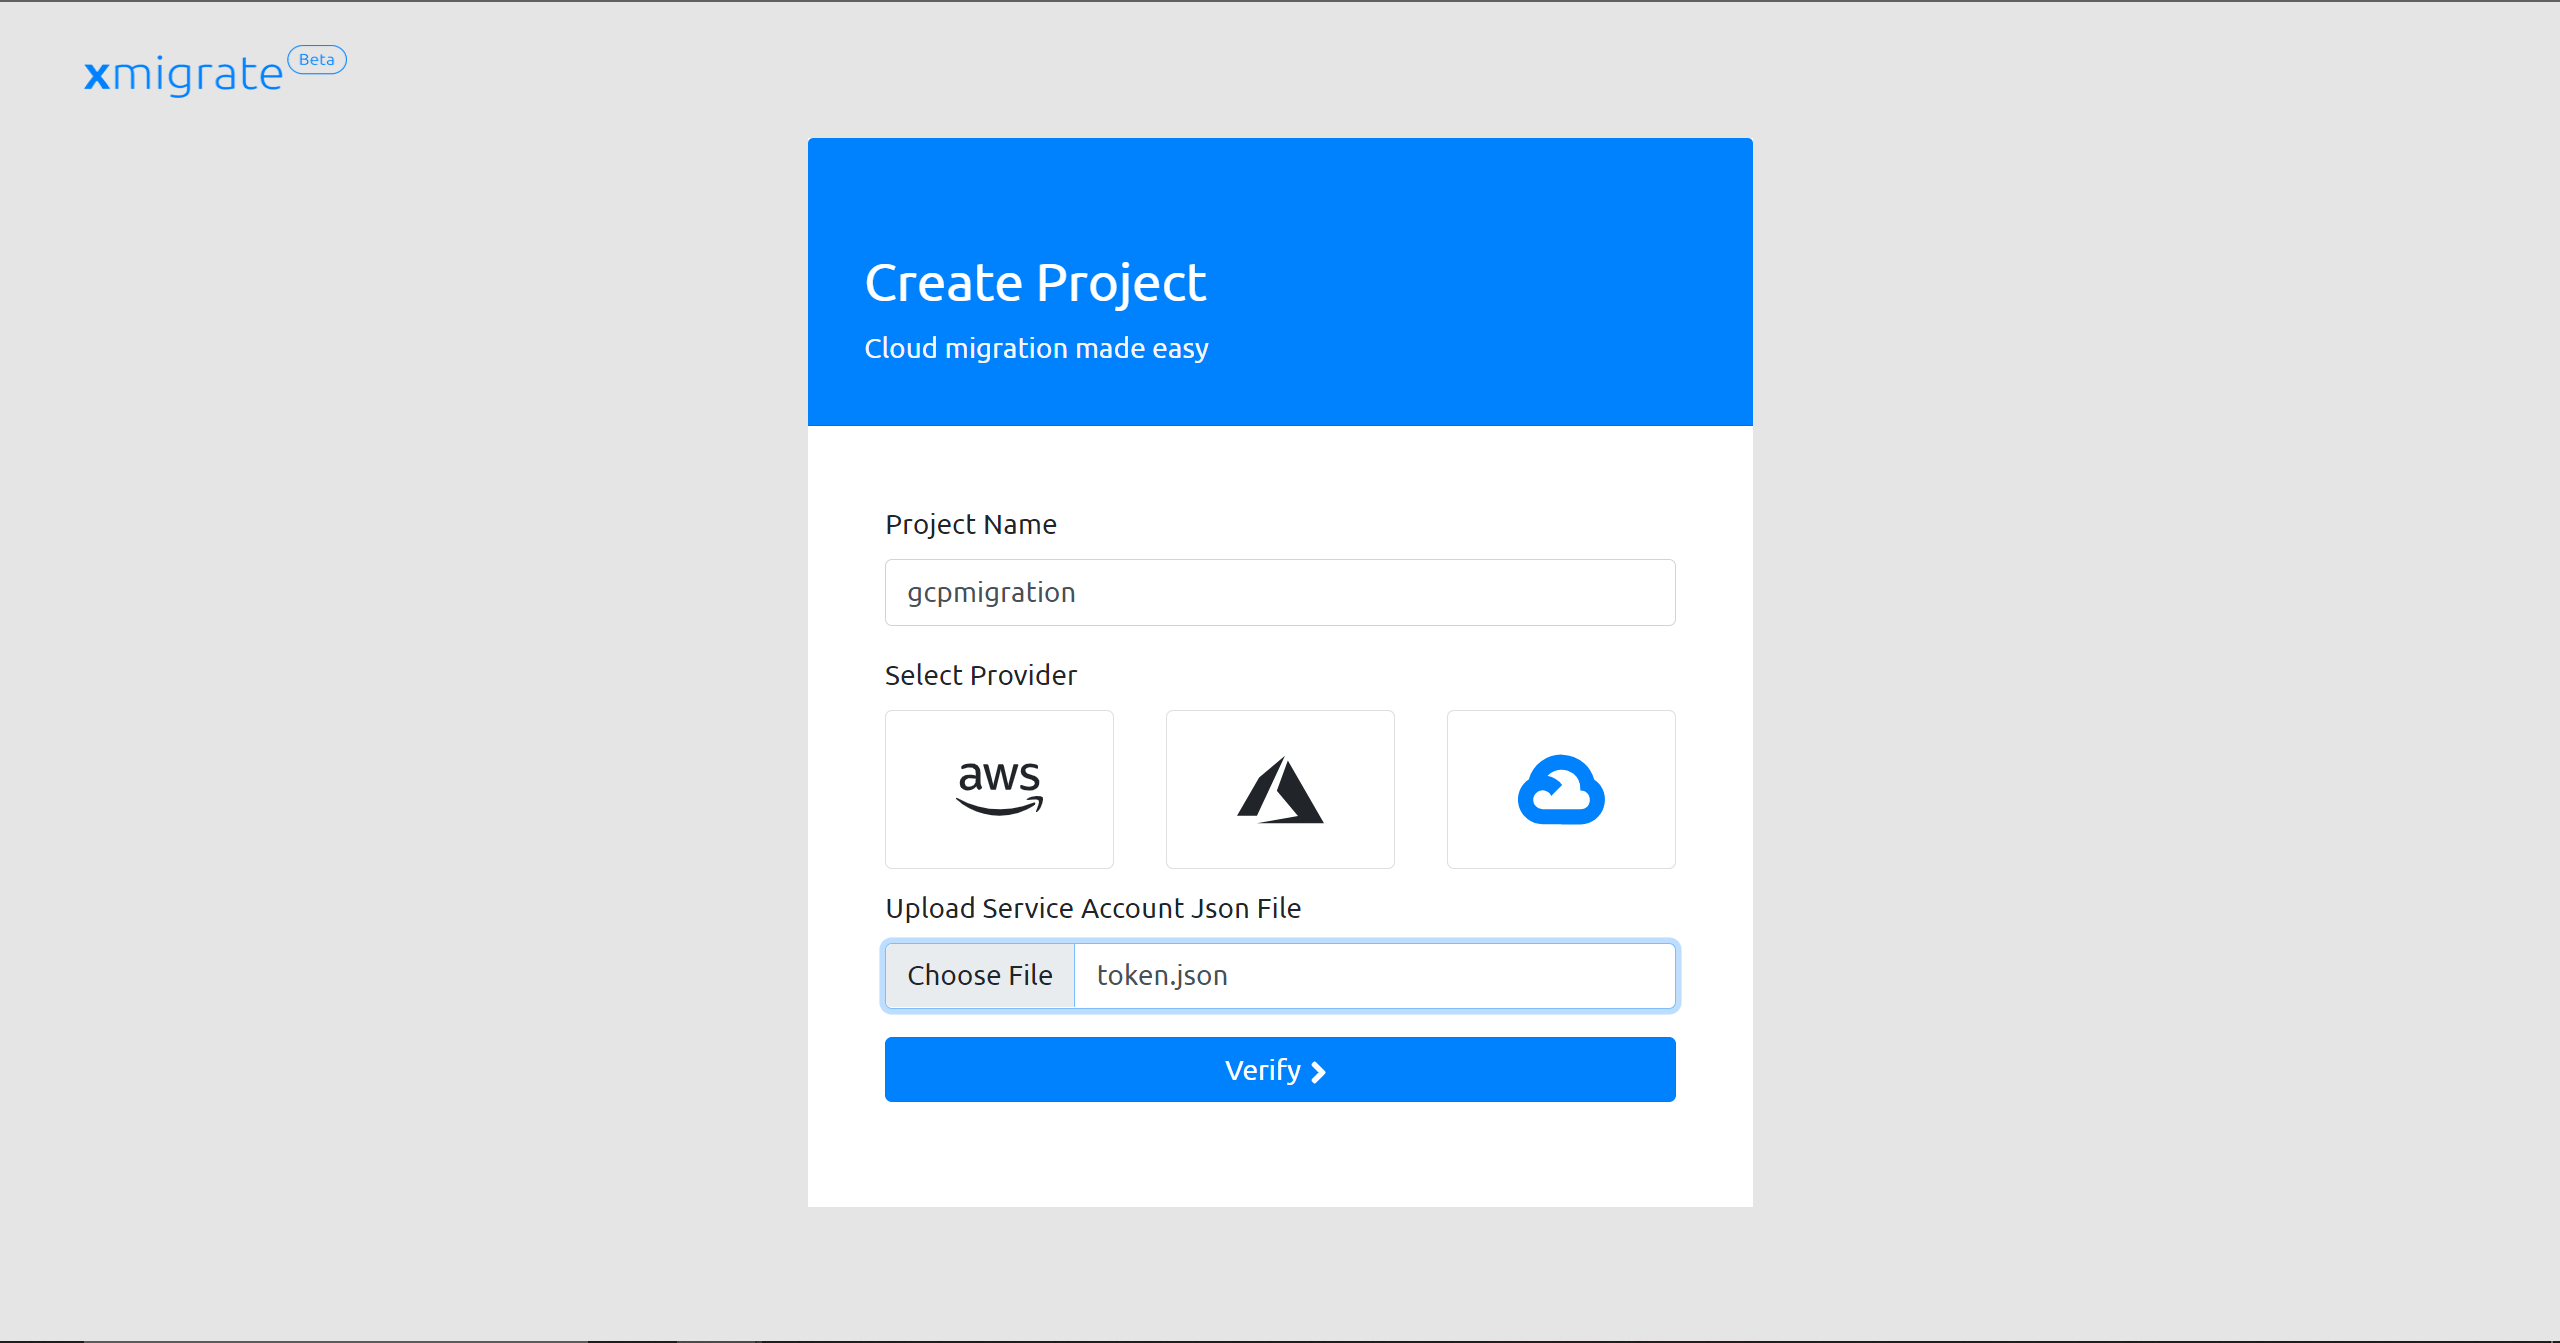
The project creation process for GCP is also very similar to both AWS and Azure. We need a cloud storage bucket with an access key and secret key, and service account credentials for resource creation. Follow the below steps to create a project for GCP migration.
Give a project name and click on the GCP logo to set the target cloud as GCP. Then provide the service account credential JSON file and click verify.
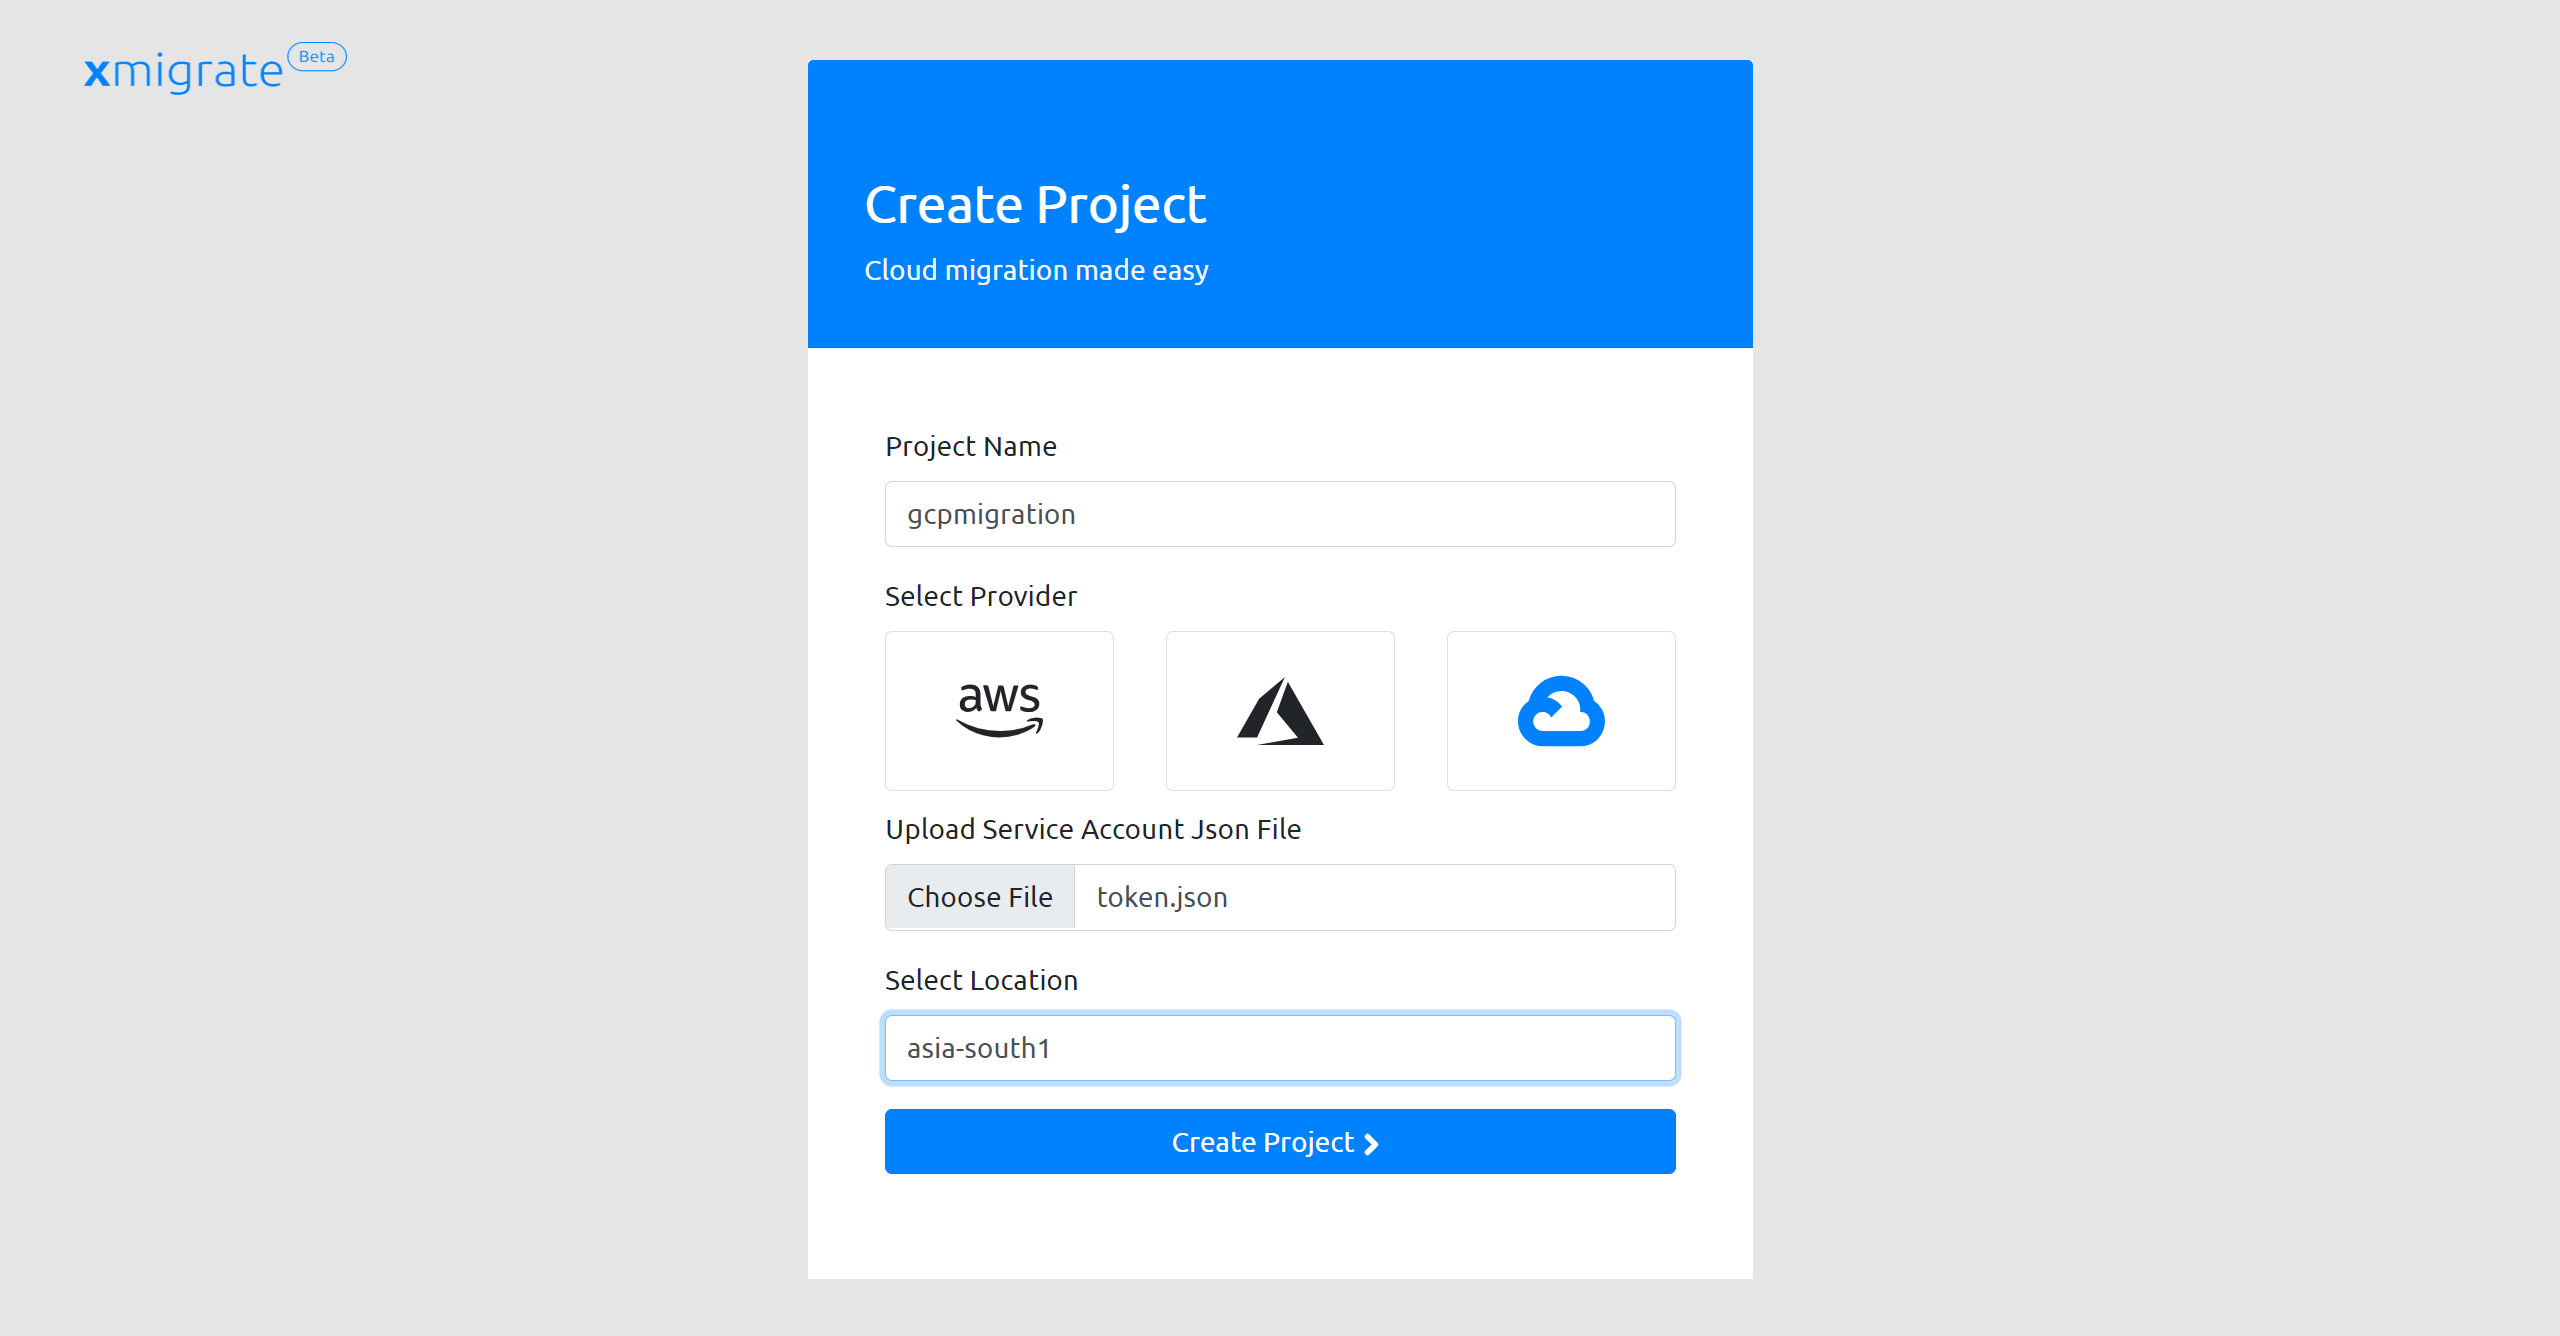
Now, you have to select a region from the dropdown menu. This region should be the same as the region of the storage bucket. If the dropdown list is empty, then either the credentials are wrong or the service account might not have sufficient privileges.
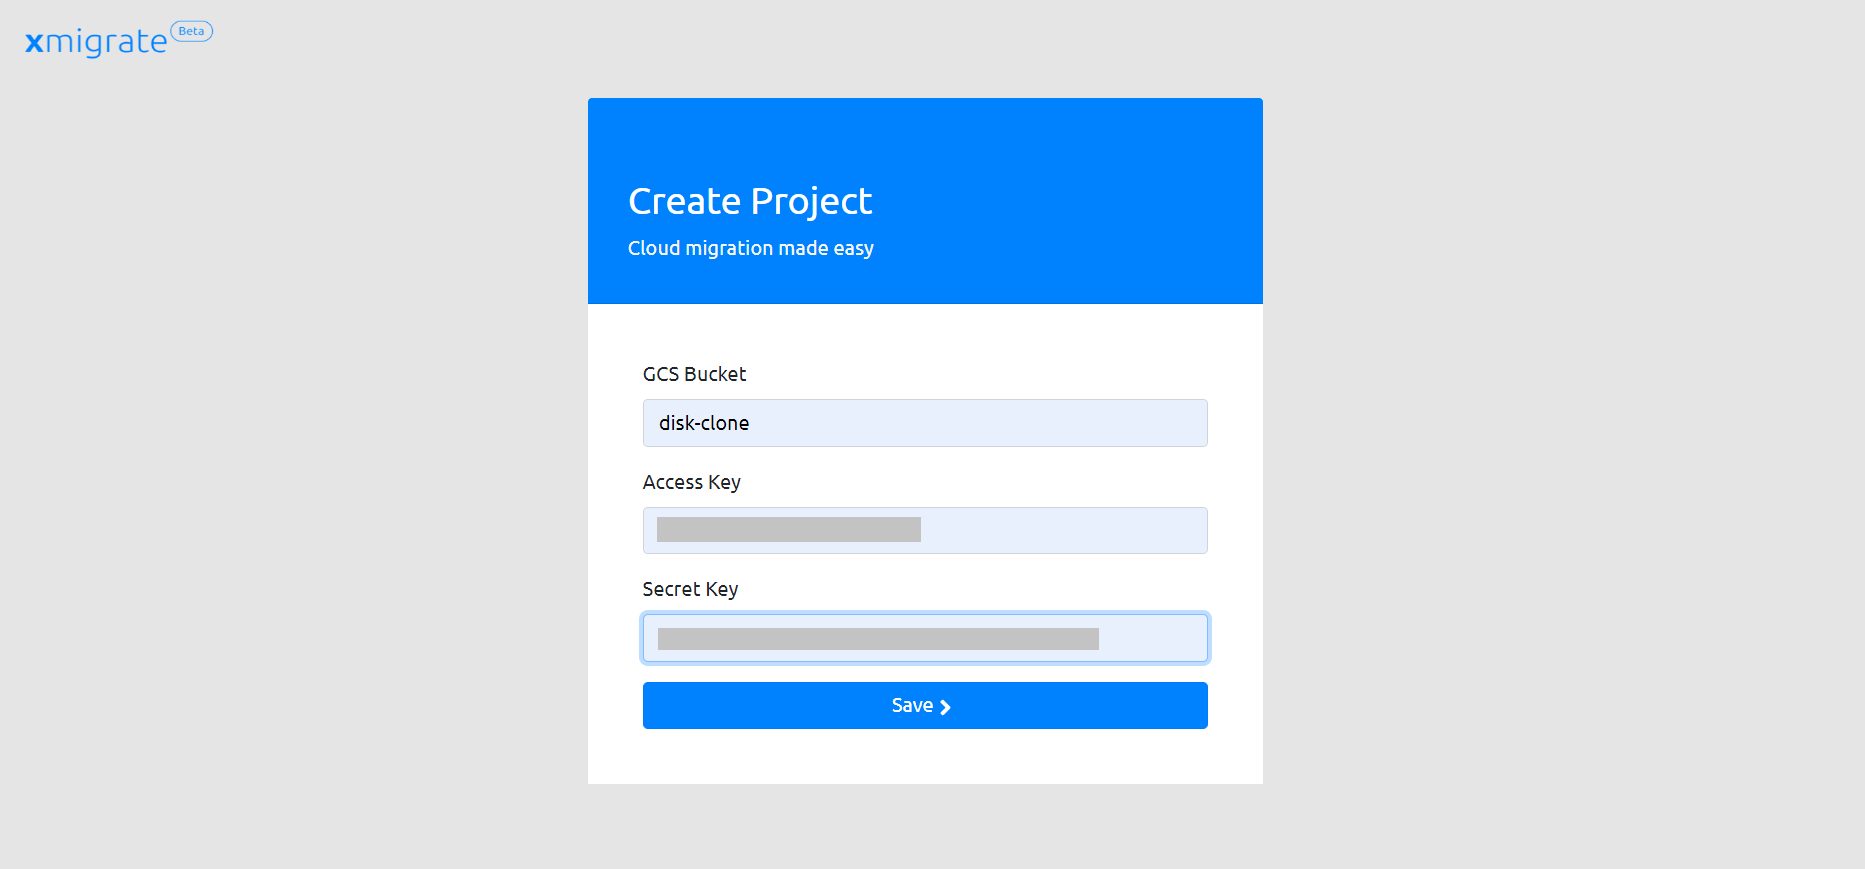
On this screen you have to enter the cloud storage bucket details. Enter the bucket name, access key, and secret key and press the save button to create the project.
Migration
We can start migrating servers after creating the project. But before getting into the migration process with xmigrate, please ensure the following points;
Make sure /etc/fstab contains the mount points with block-id rather than the device label.
Make sure the discard flag is added in the /etc/fstab mount point entries.
Ensure 5th flags of /etc/fstab mount point entries are 1 and 6th flag for the boot volume is 1.
- The migration process involves seven main steps,
Discovery
Blueprint creation
Landing zone creation
VM Preparation
Disk cloning
Disk conversion
Server build in the target cloud
Discovery
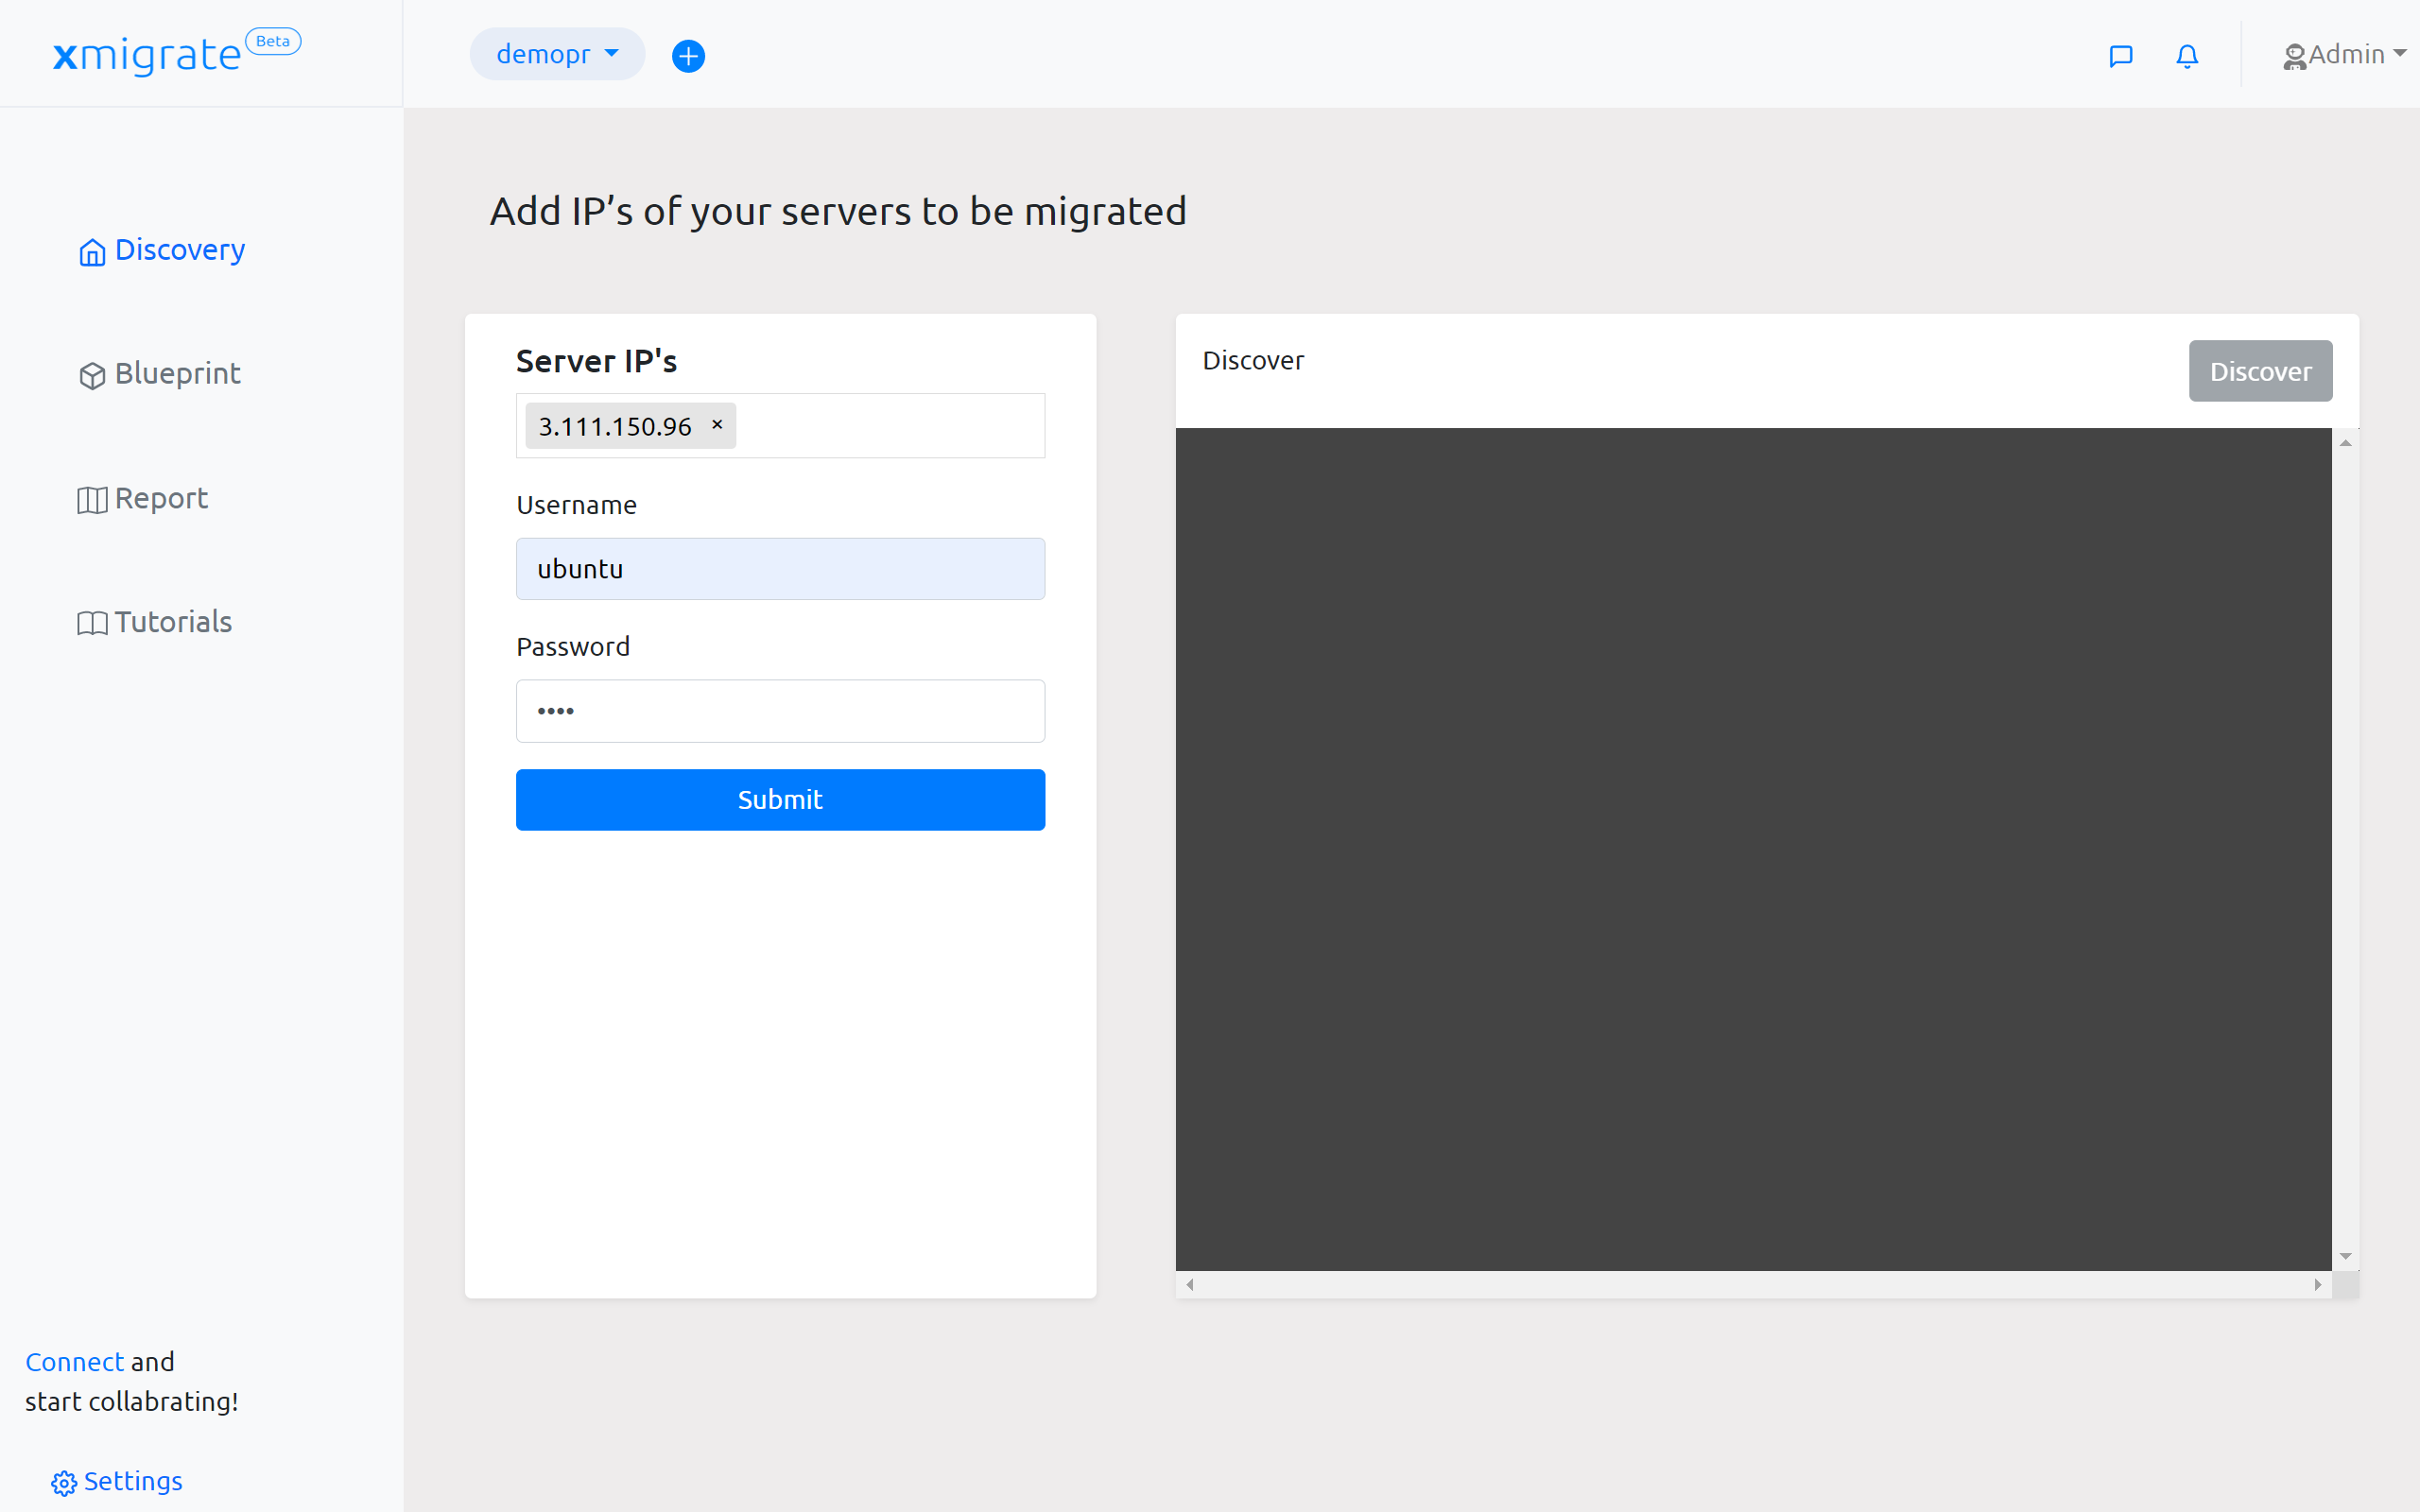
The initial step of migration process is gathering information about the server and the network. We can provide the IPs or hostnames in the server ips field. It also needs a username and the curresponding password for login, and make sure the user has sudo privilege. The same user credentials should be common for all the servers.
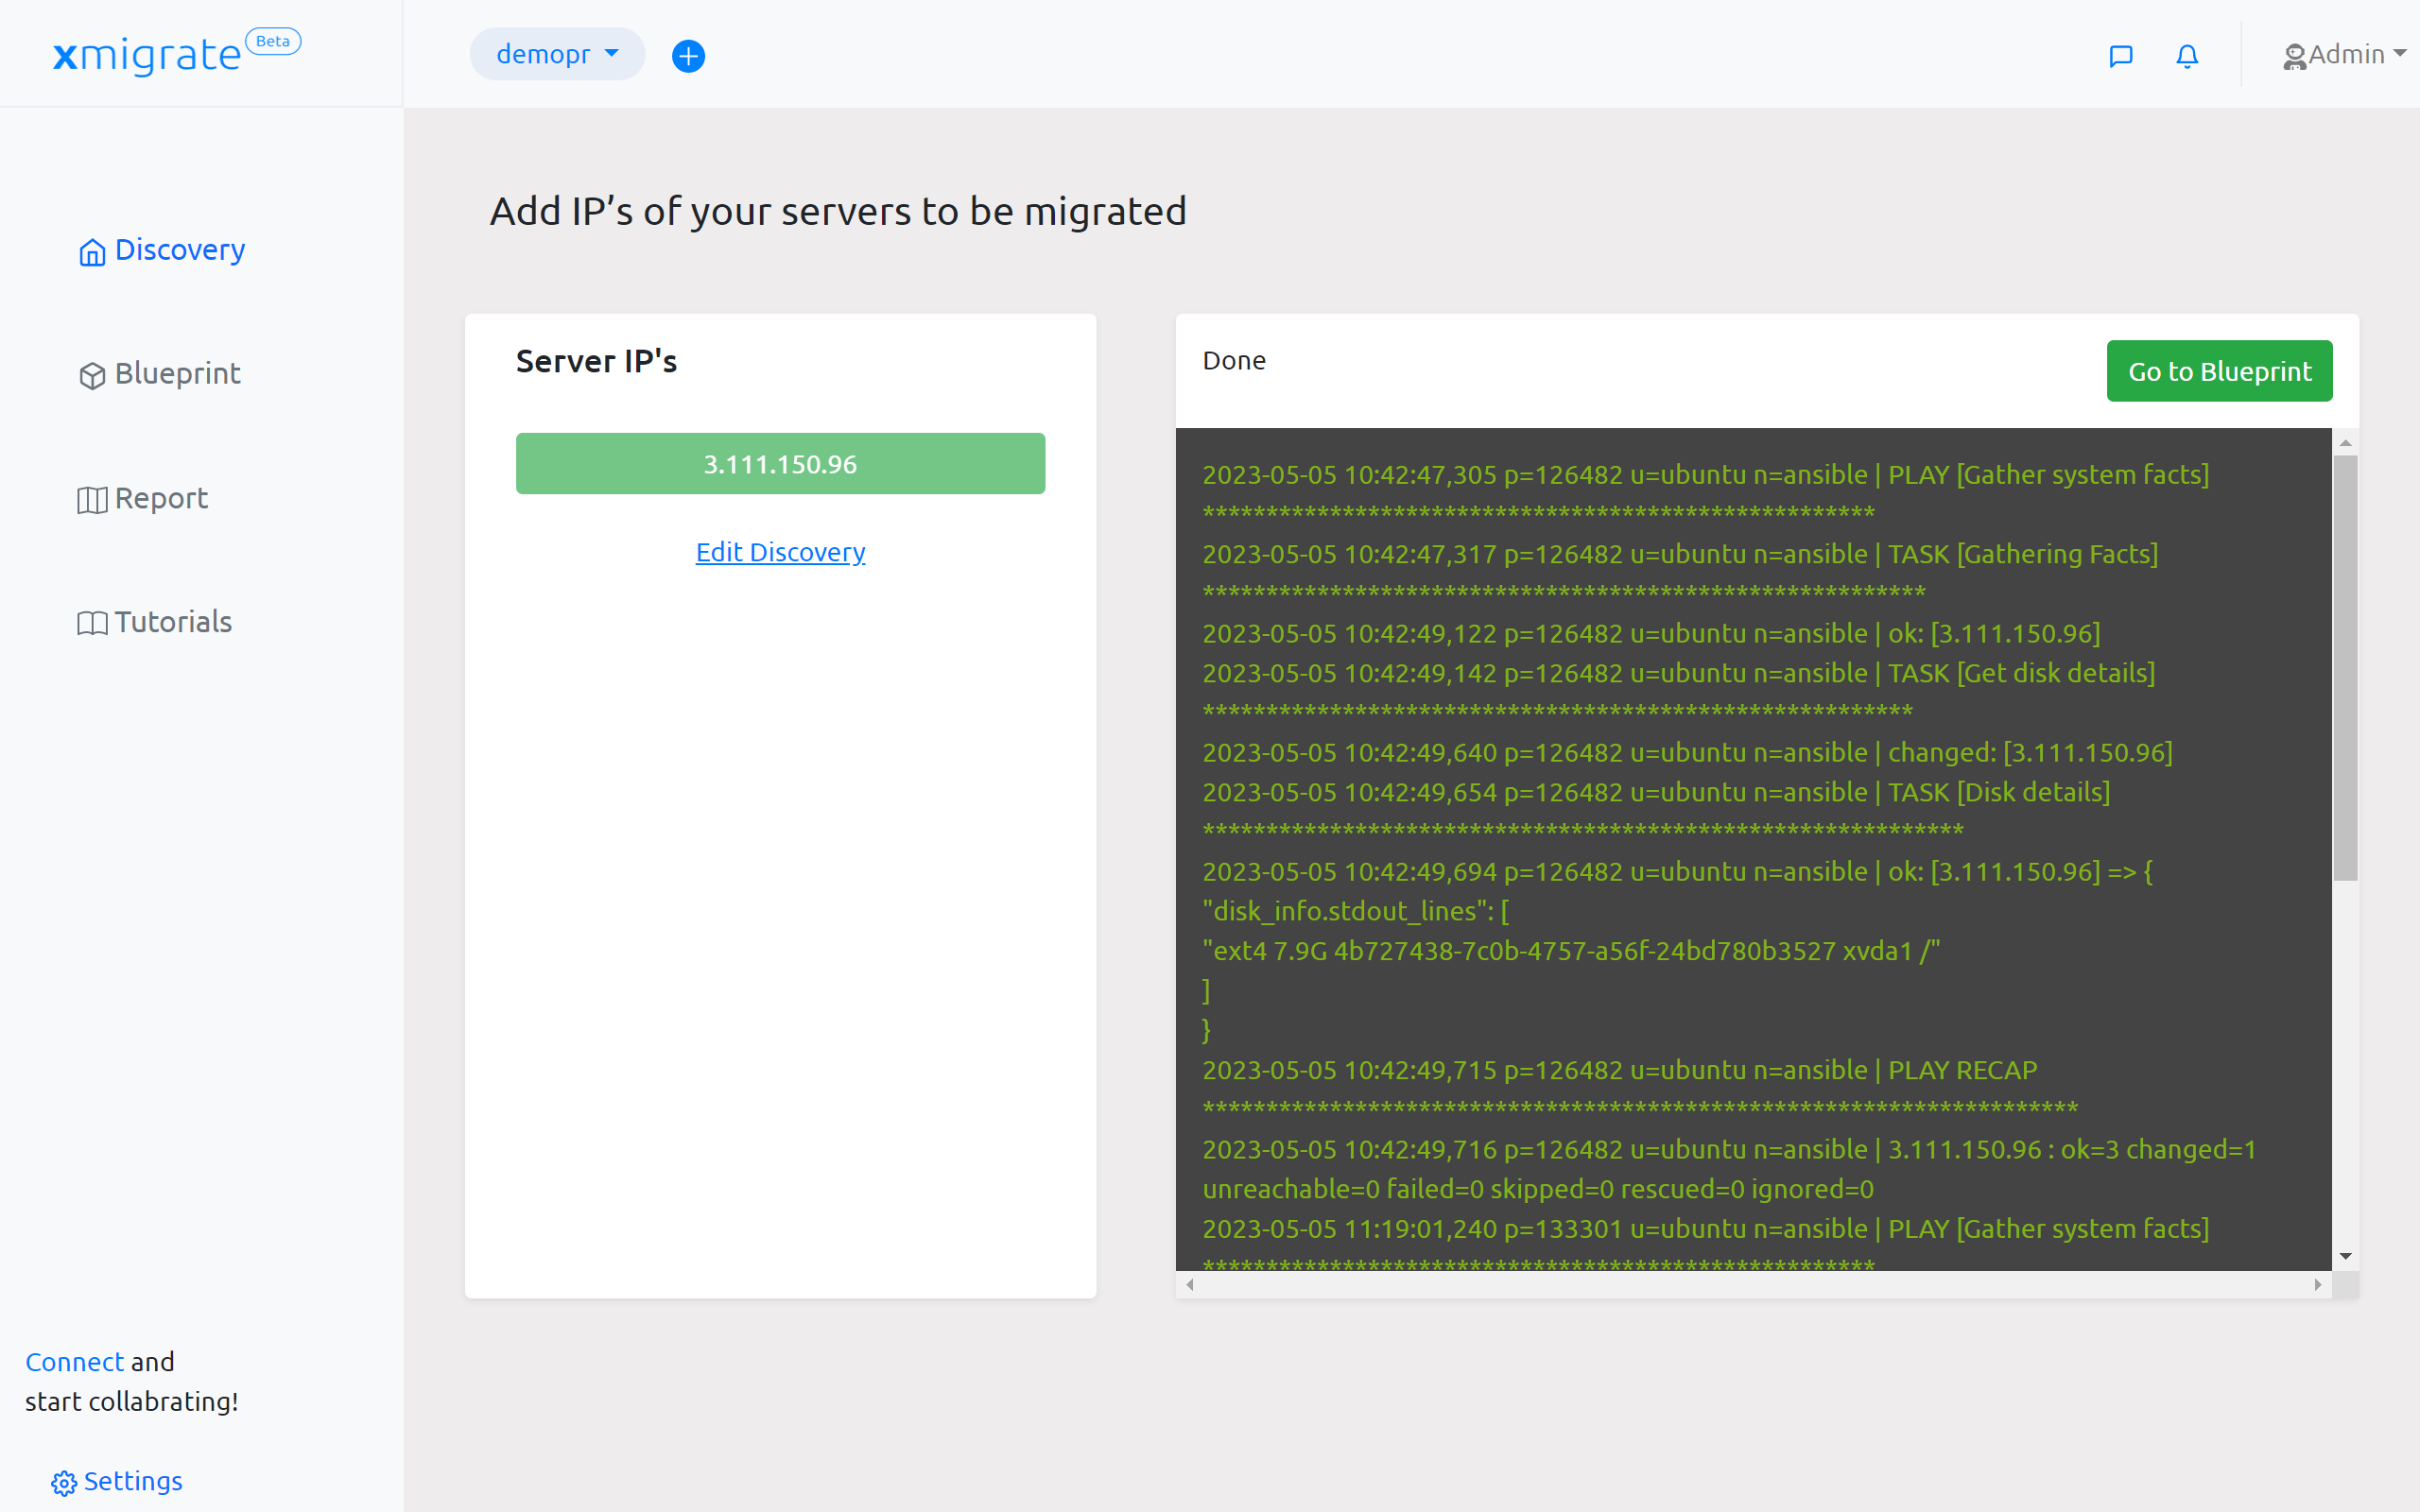
Once the discovery is finished, the Go to Blueprint button will be enabled and we should click on that to go to the blueprint creation page.
Blueprint creation
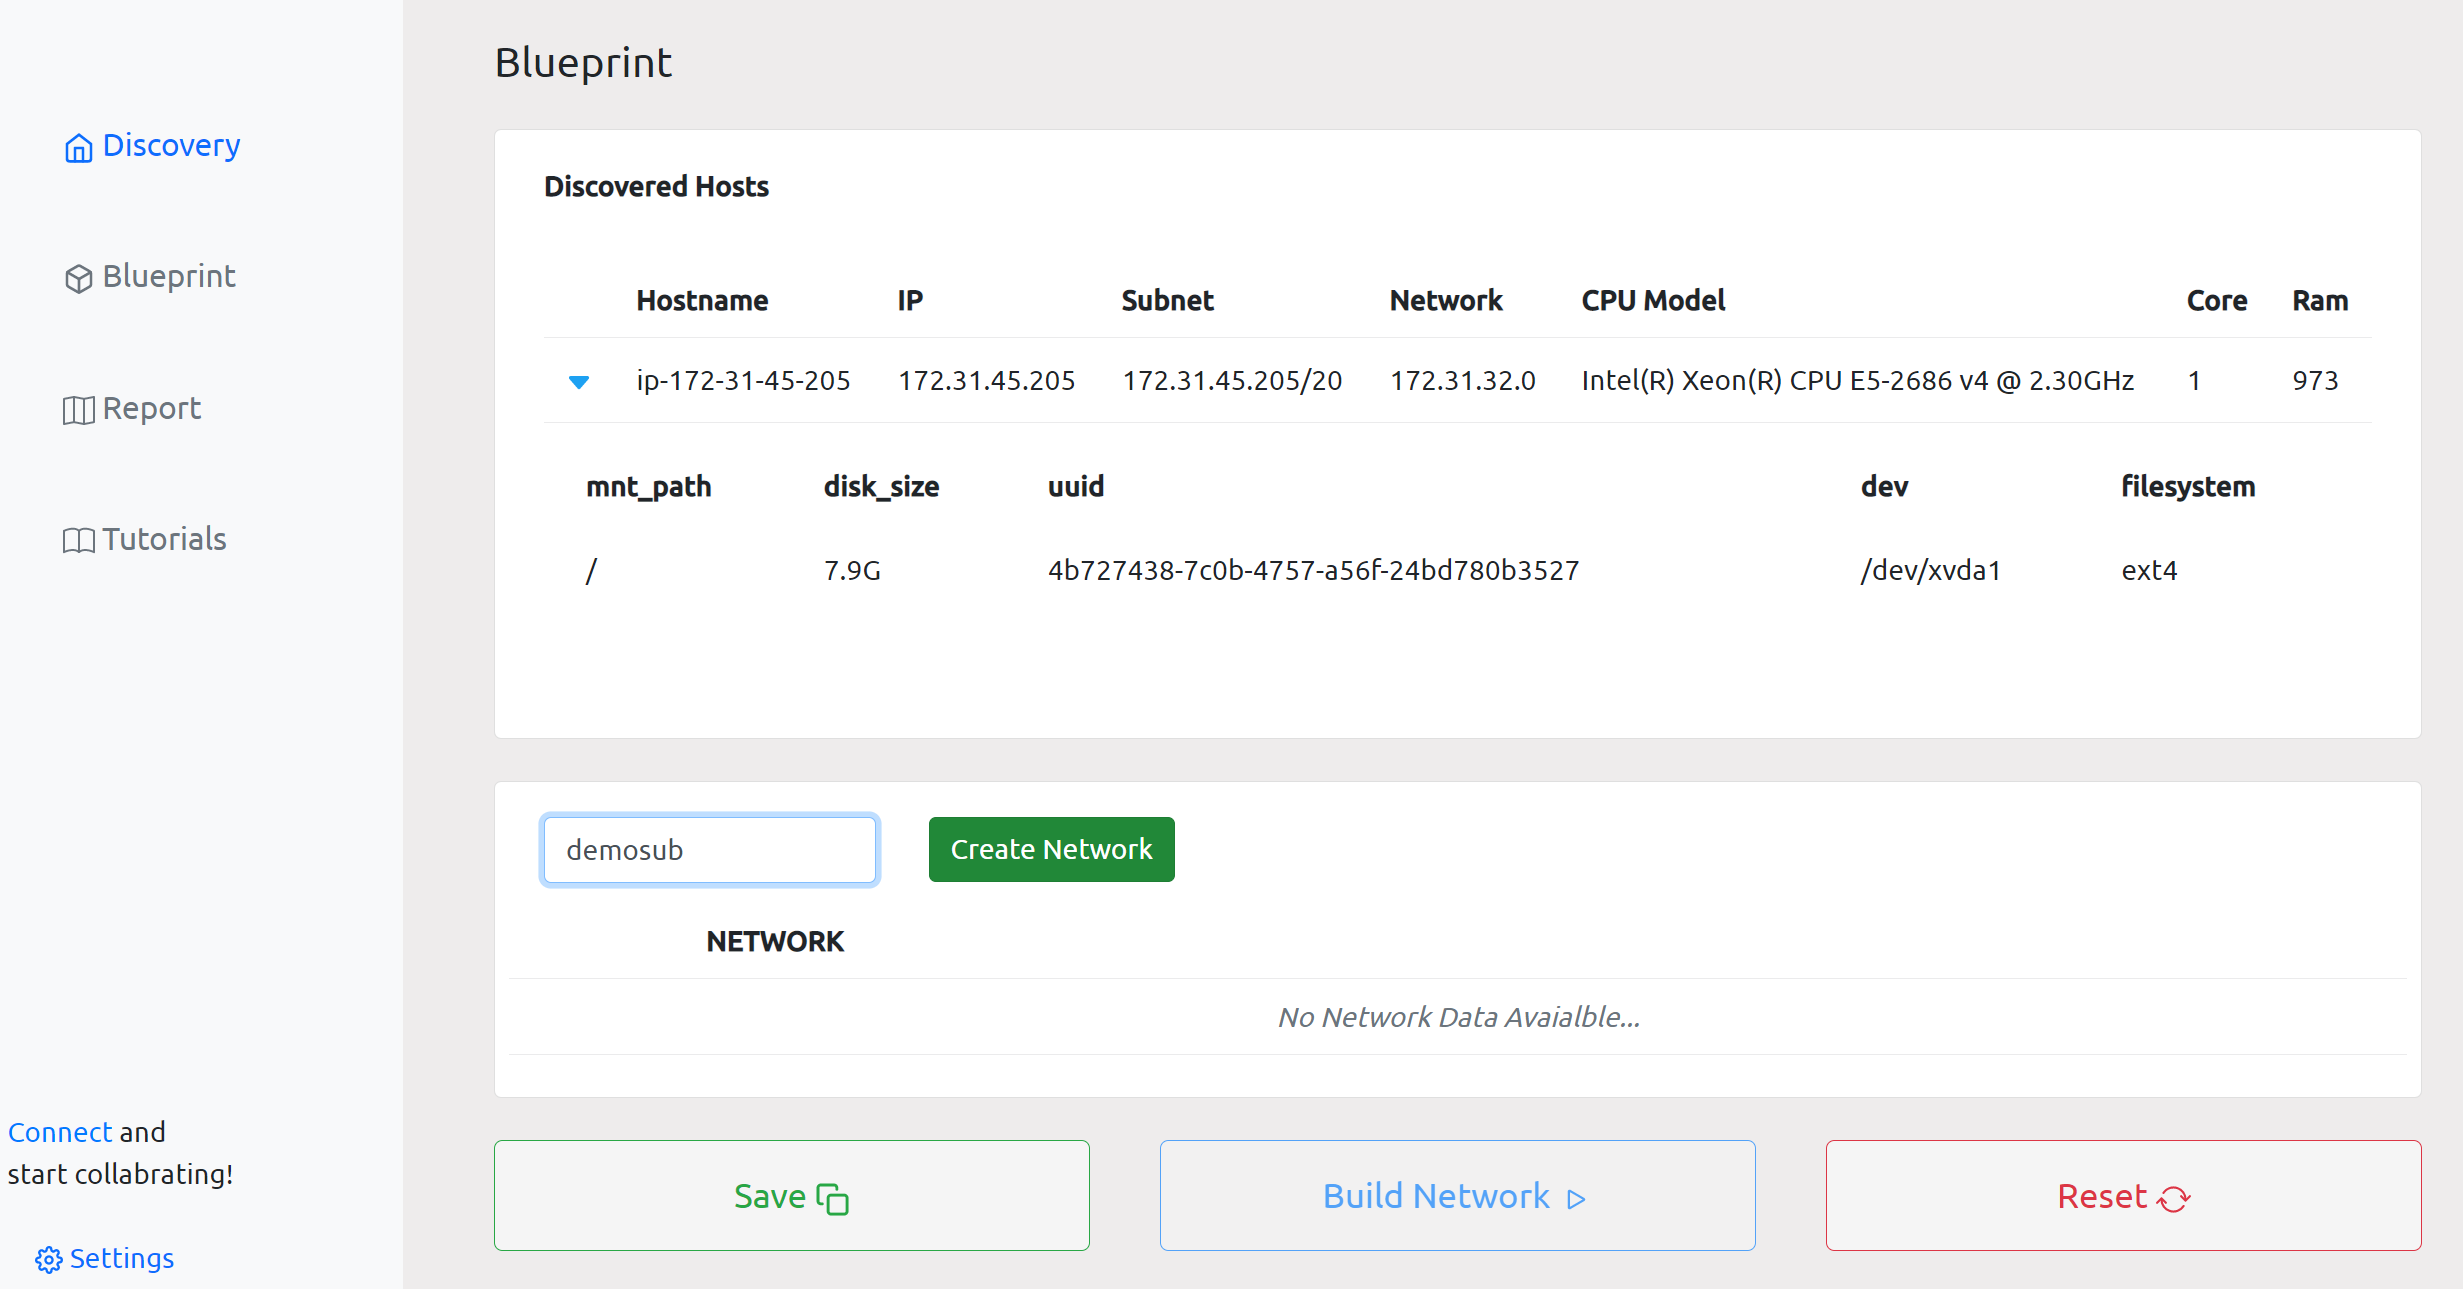
In the blueprint creation process, we design the landing zone (network and subnet CIDRs) and decide the machine type of each server. Details of each server is displayed in the first table on the blueprint page.
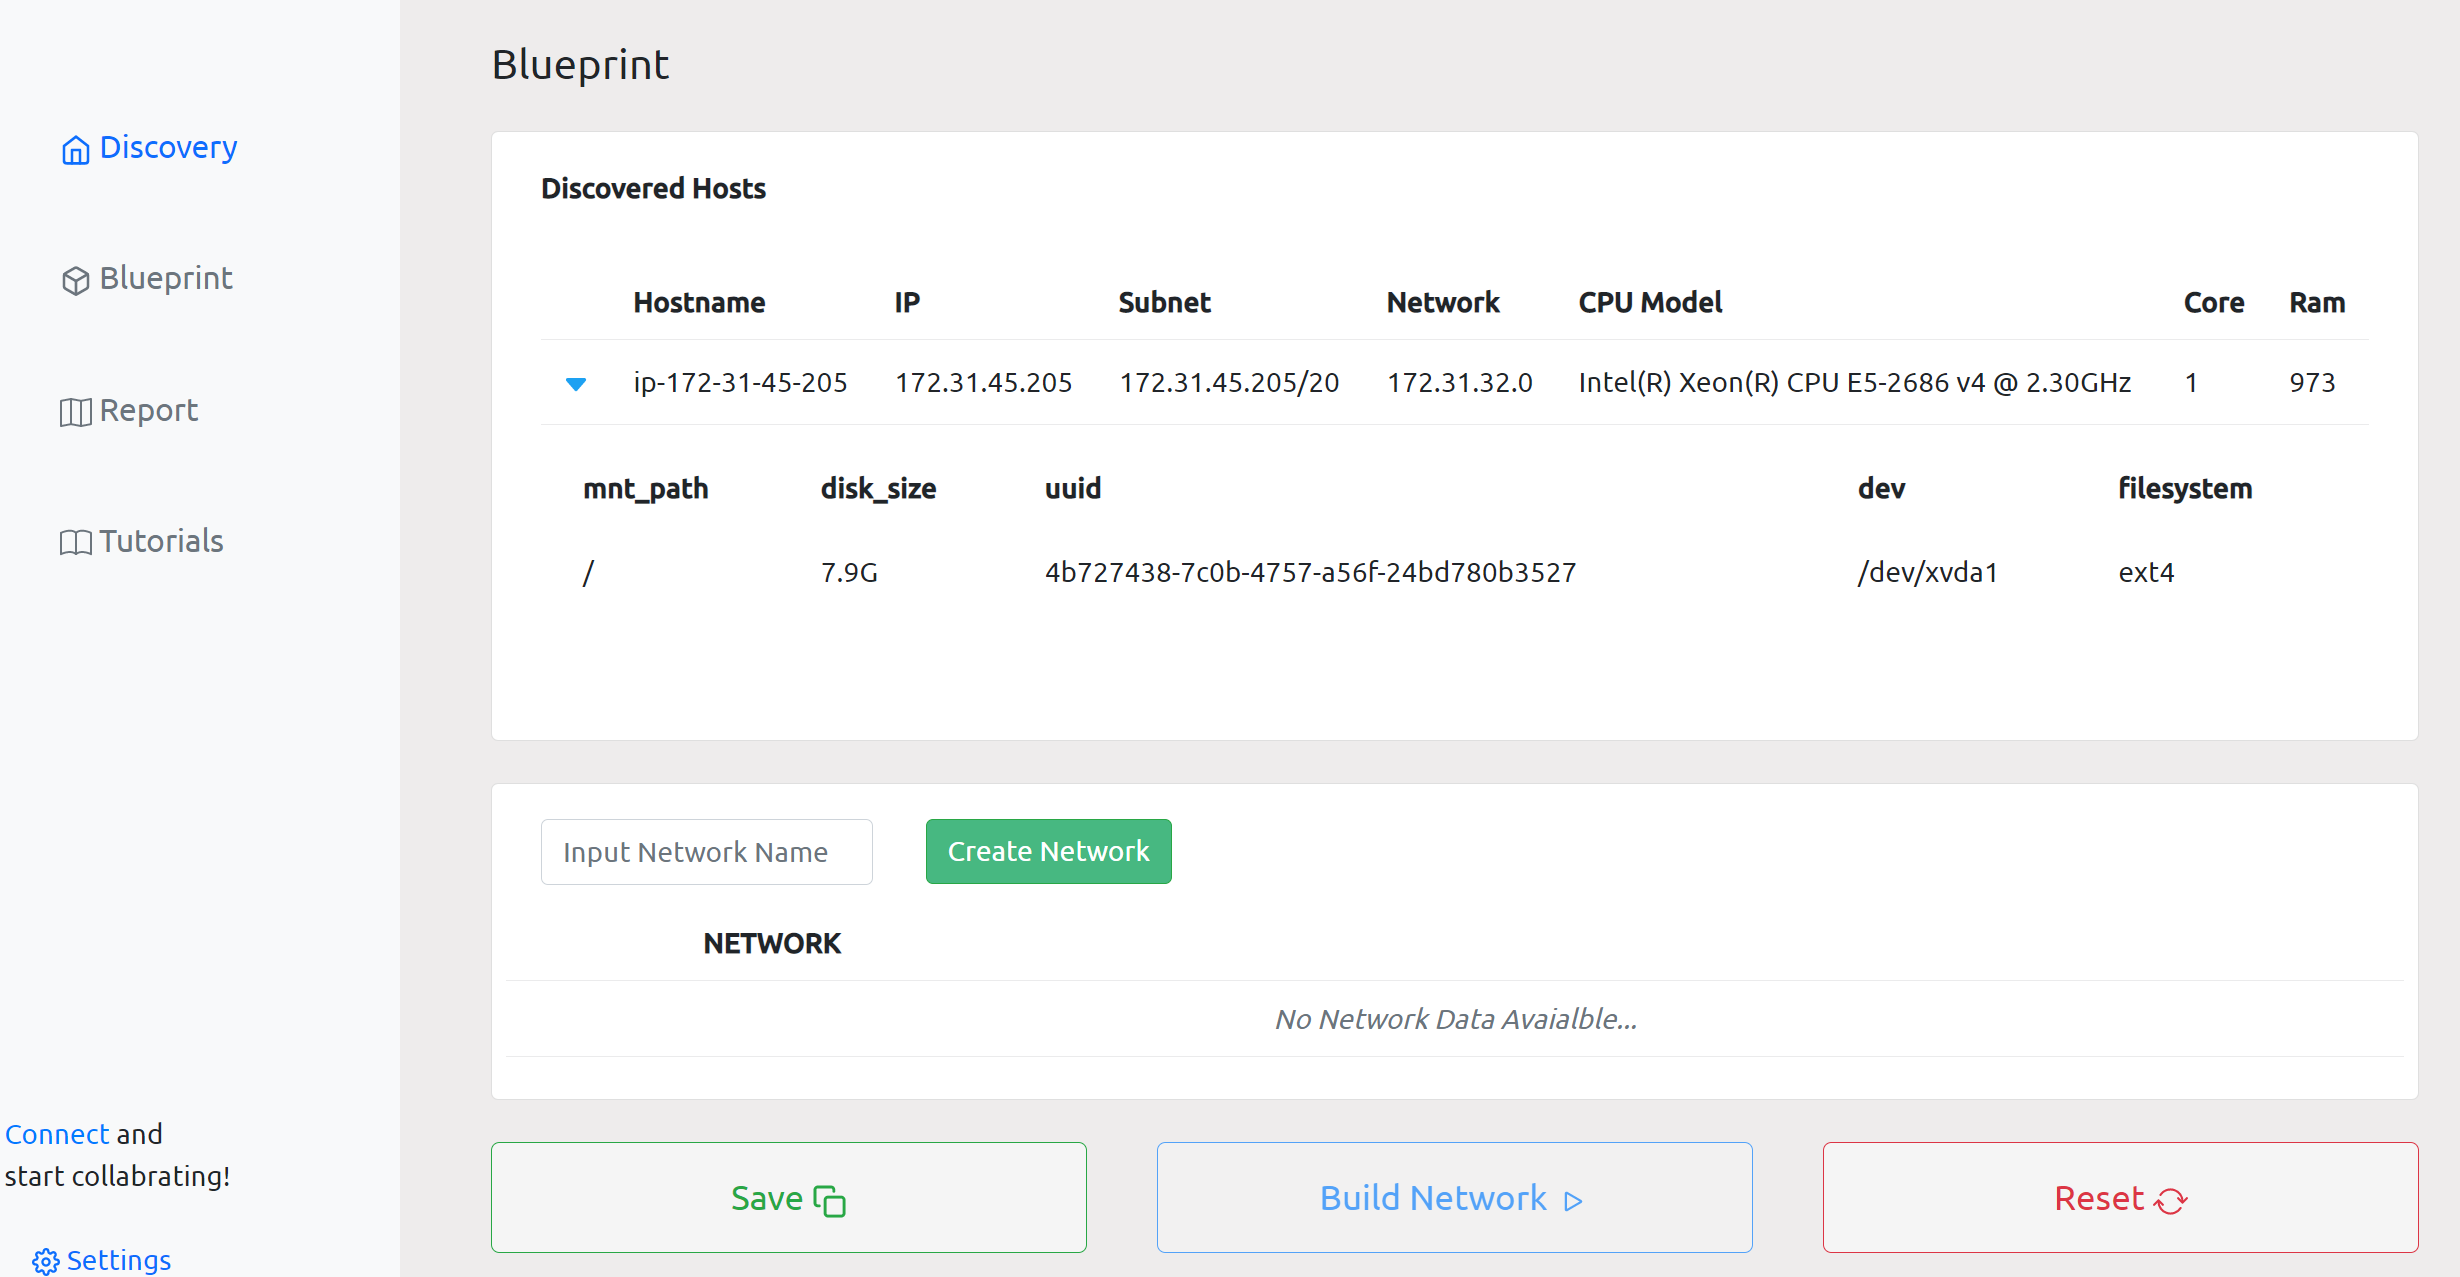
First, we need to create the network as shown in the below screenshot. Note: the example shown is that of a GCP migration which does not require network CIDR but other supported providers do.
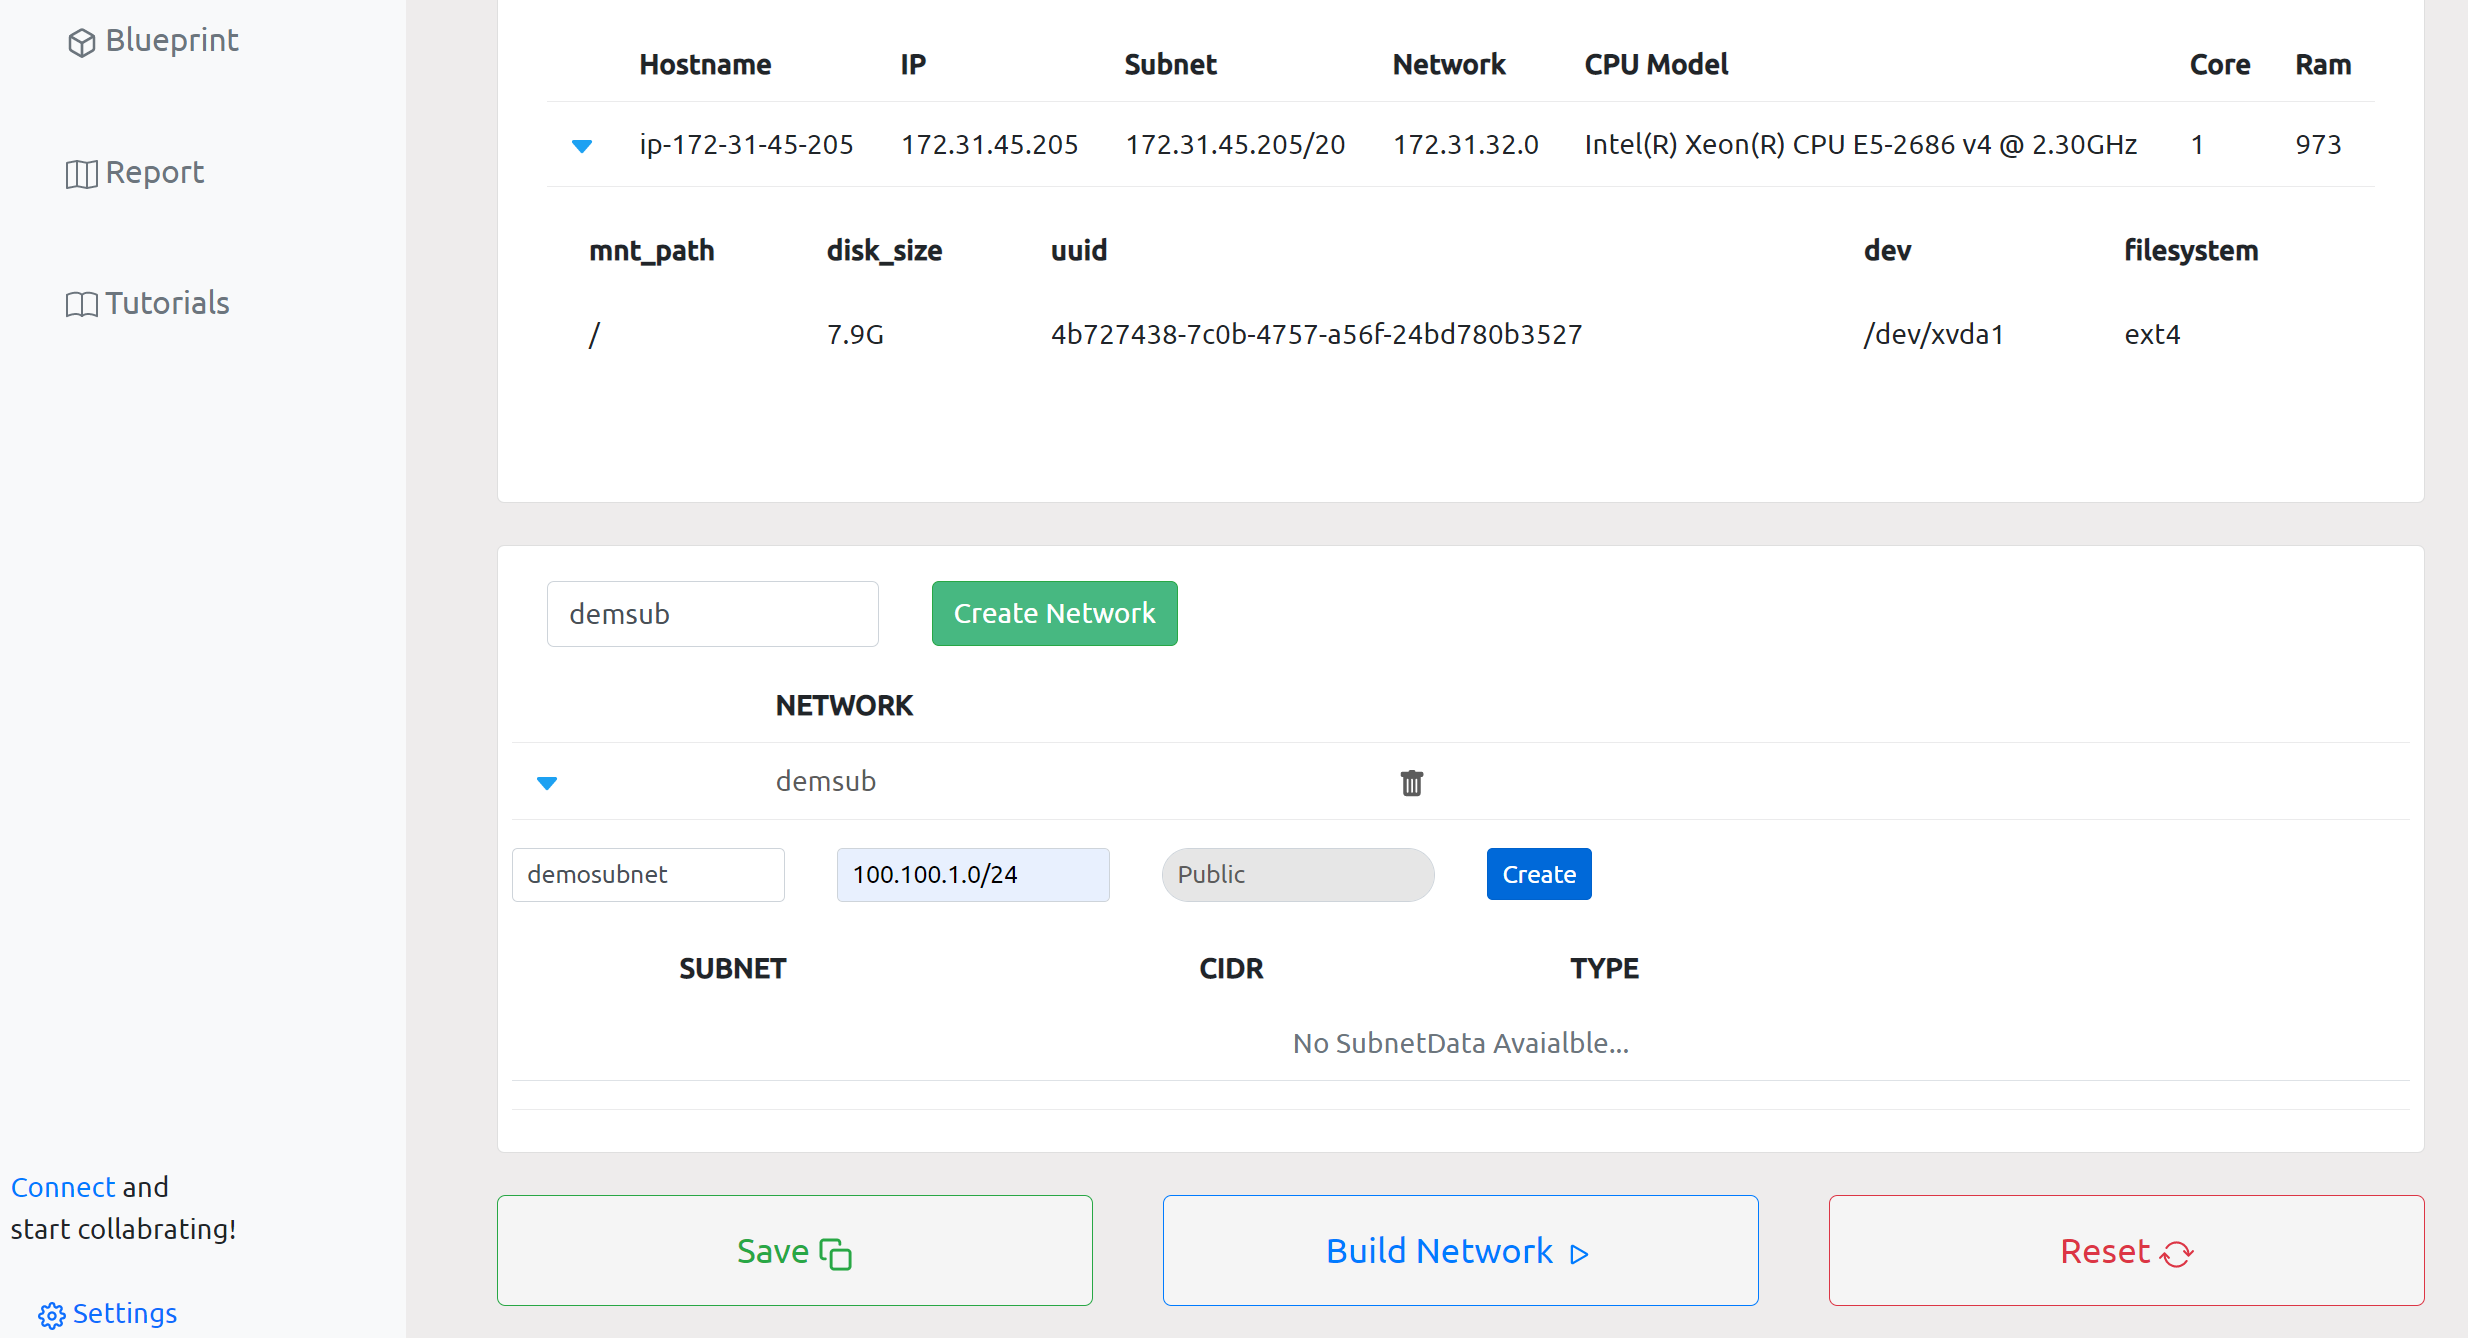
Then we need to create a subnet as shown in the below screenshot. We have to pass the subnet CIDR and select if the network is public or private.
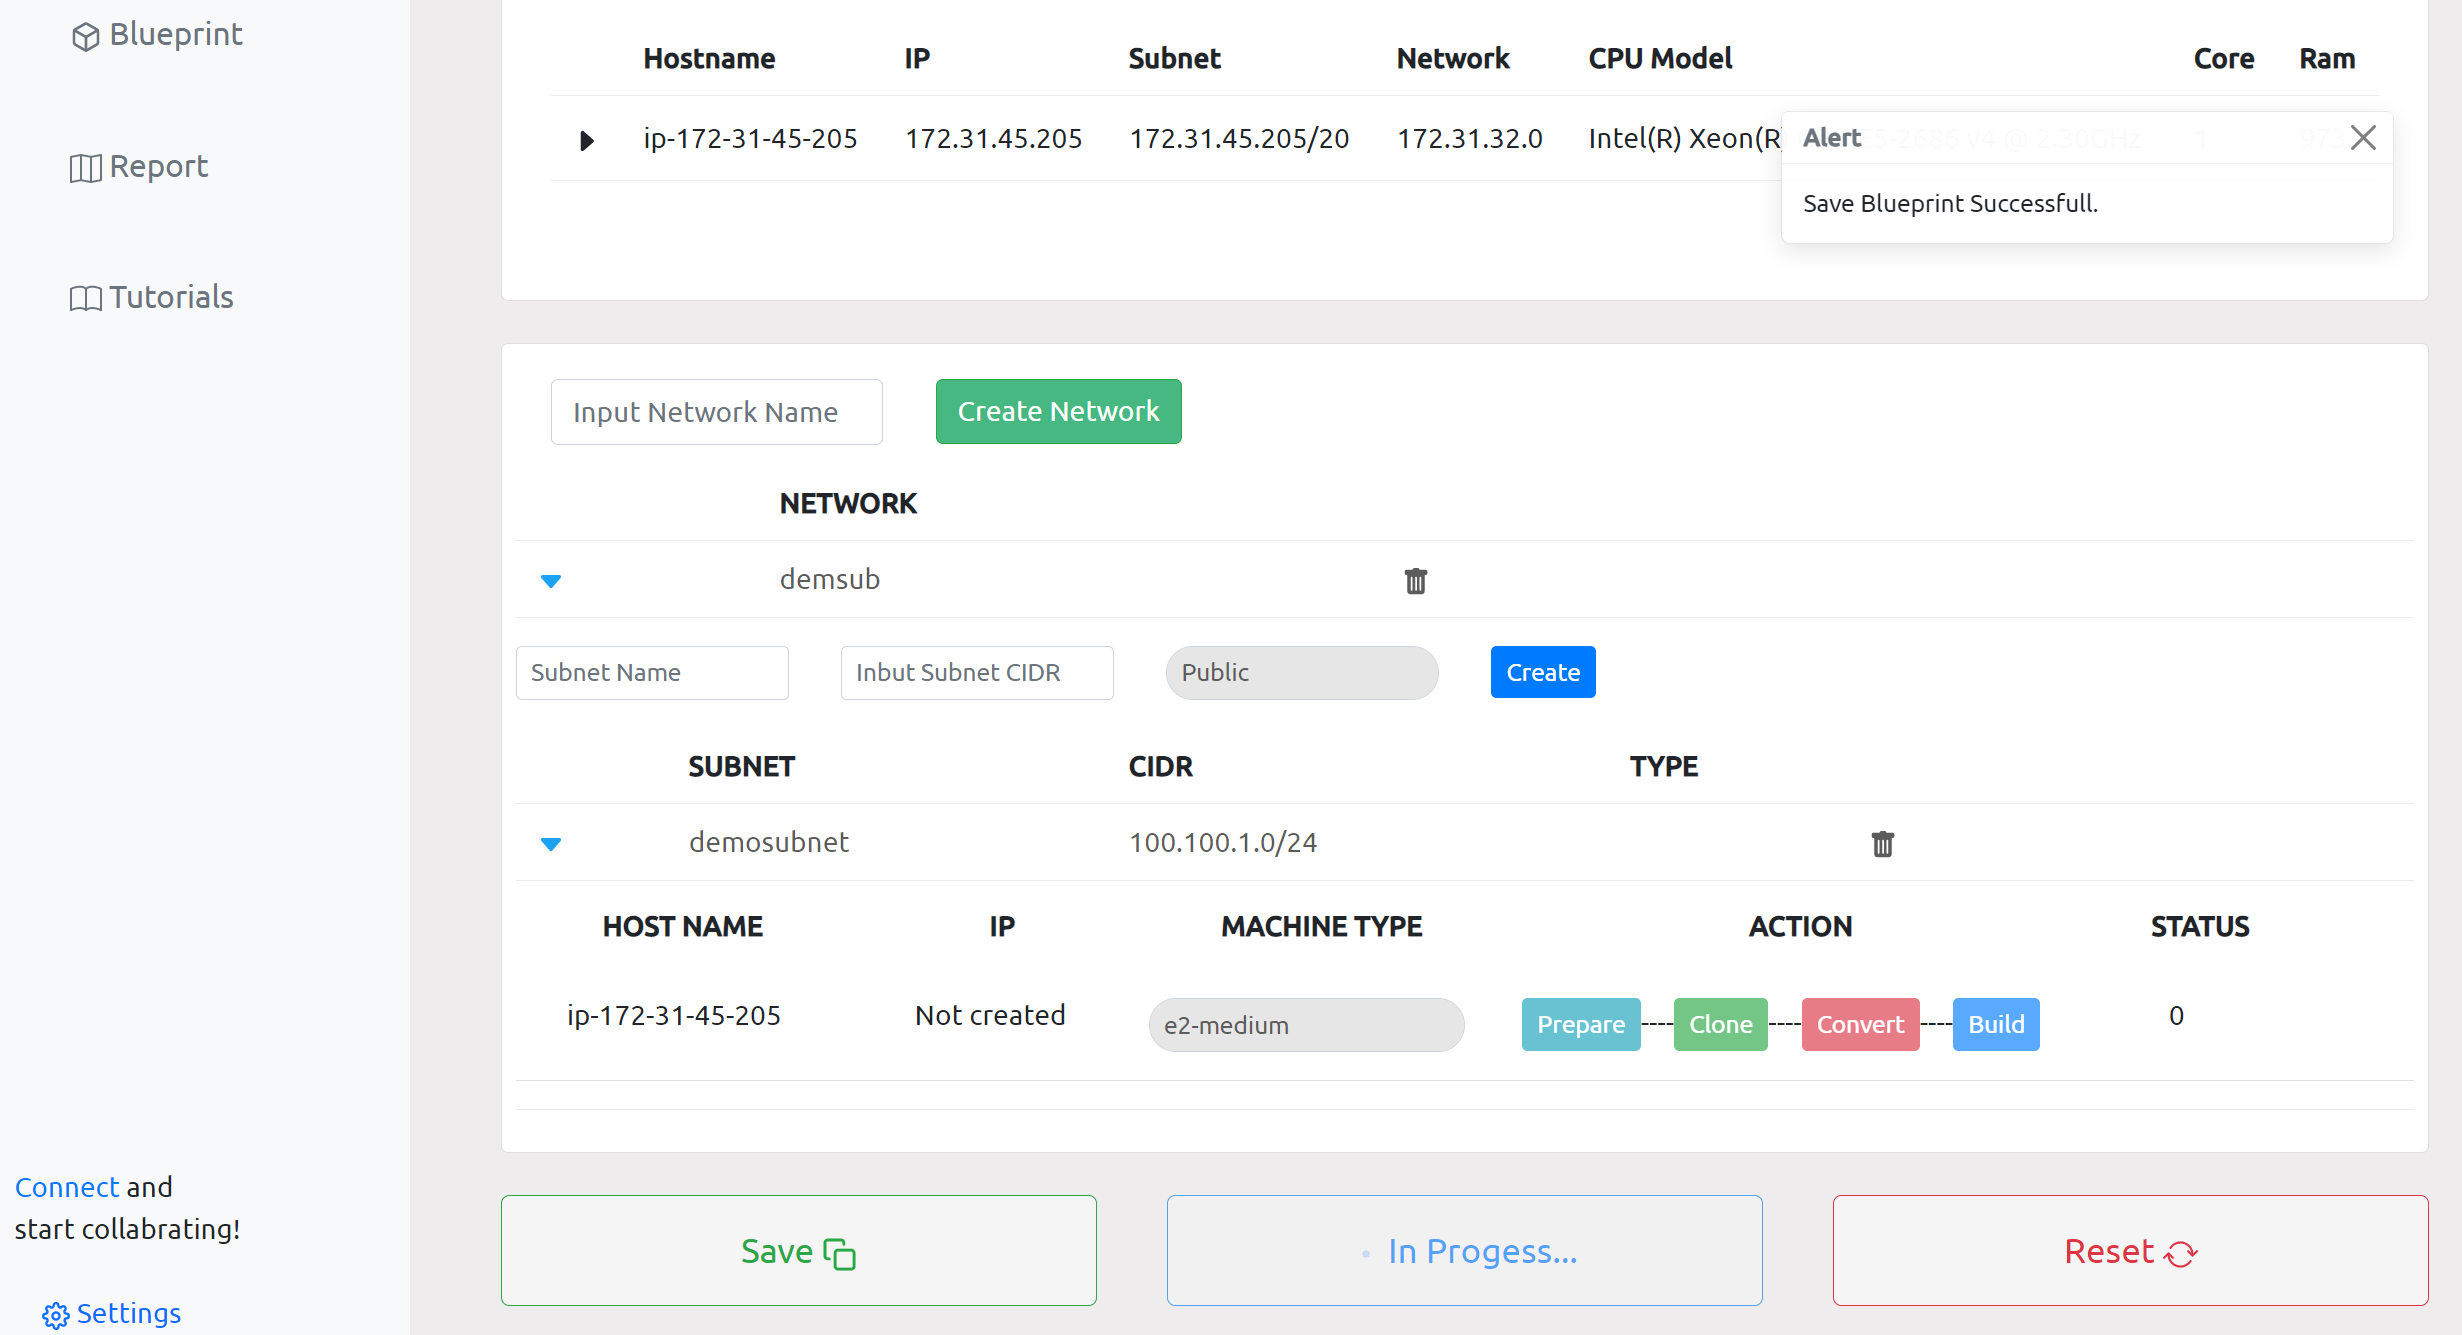
Now, we will get all the discovered servers mapped to the first subnet which we just created. The next step is to select a machine type for the server to be created in the target cloud and save the blueprint.

Landing zone creation
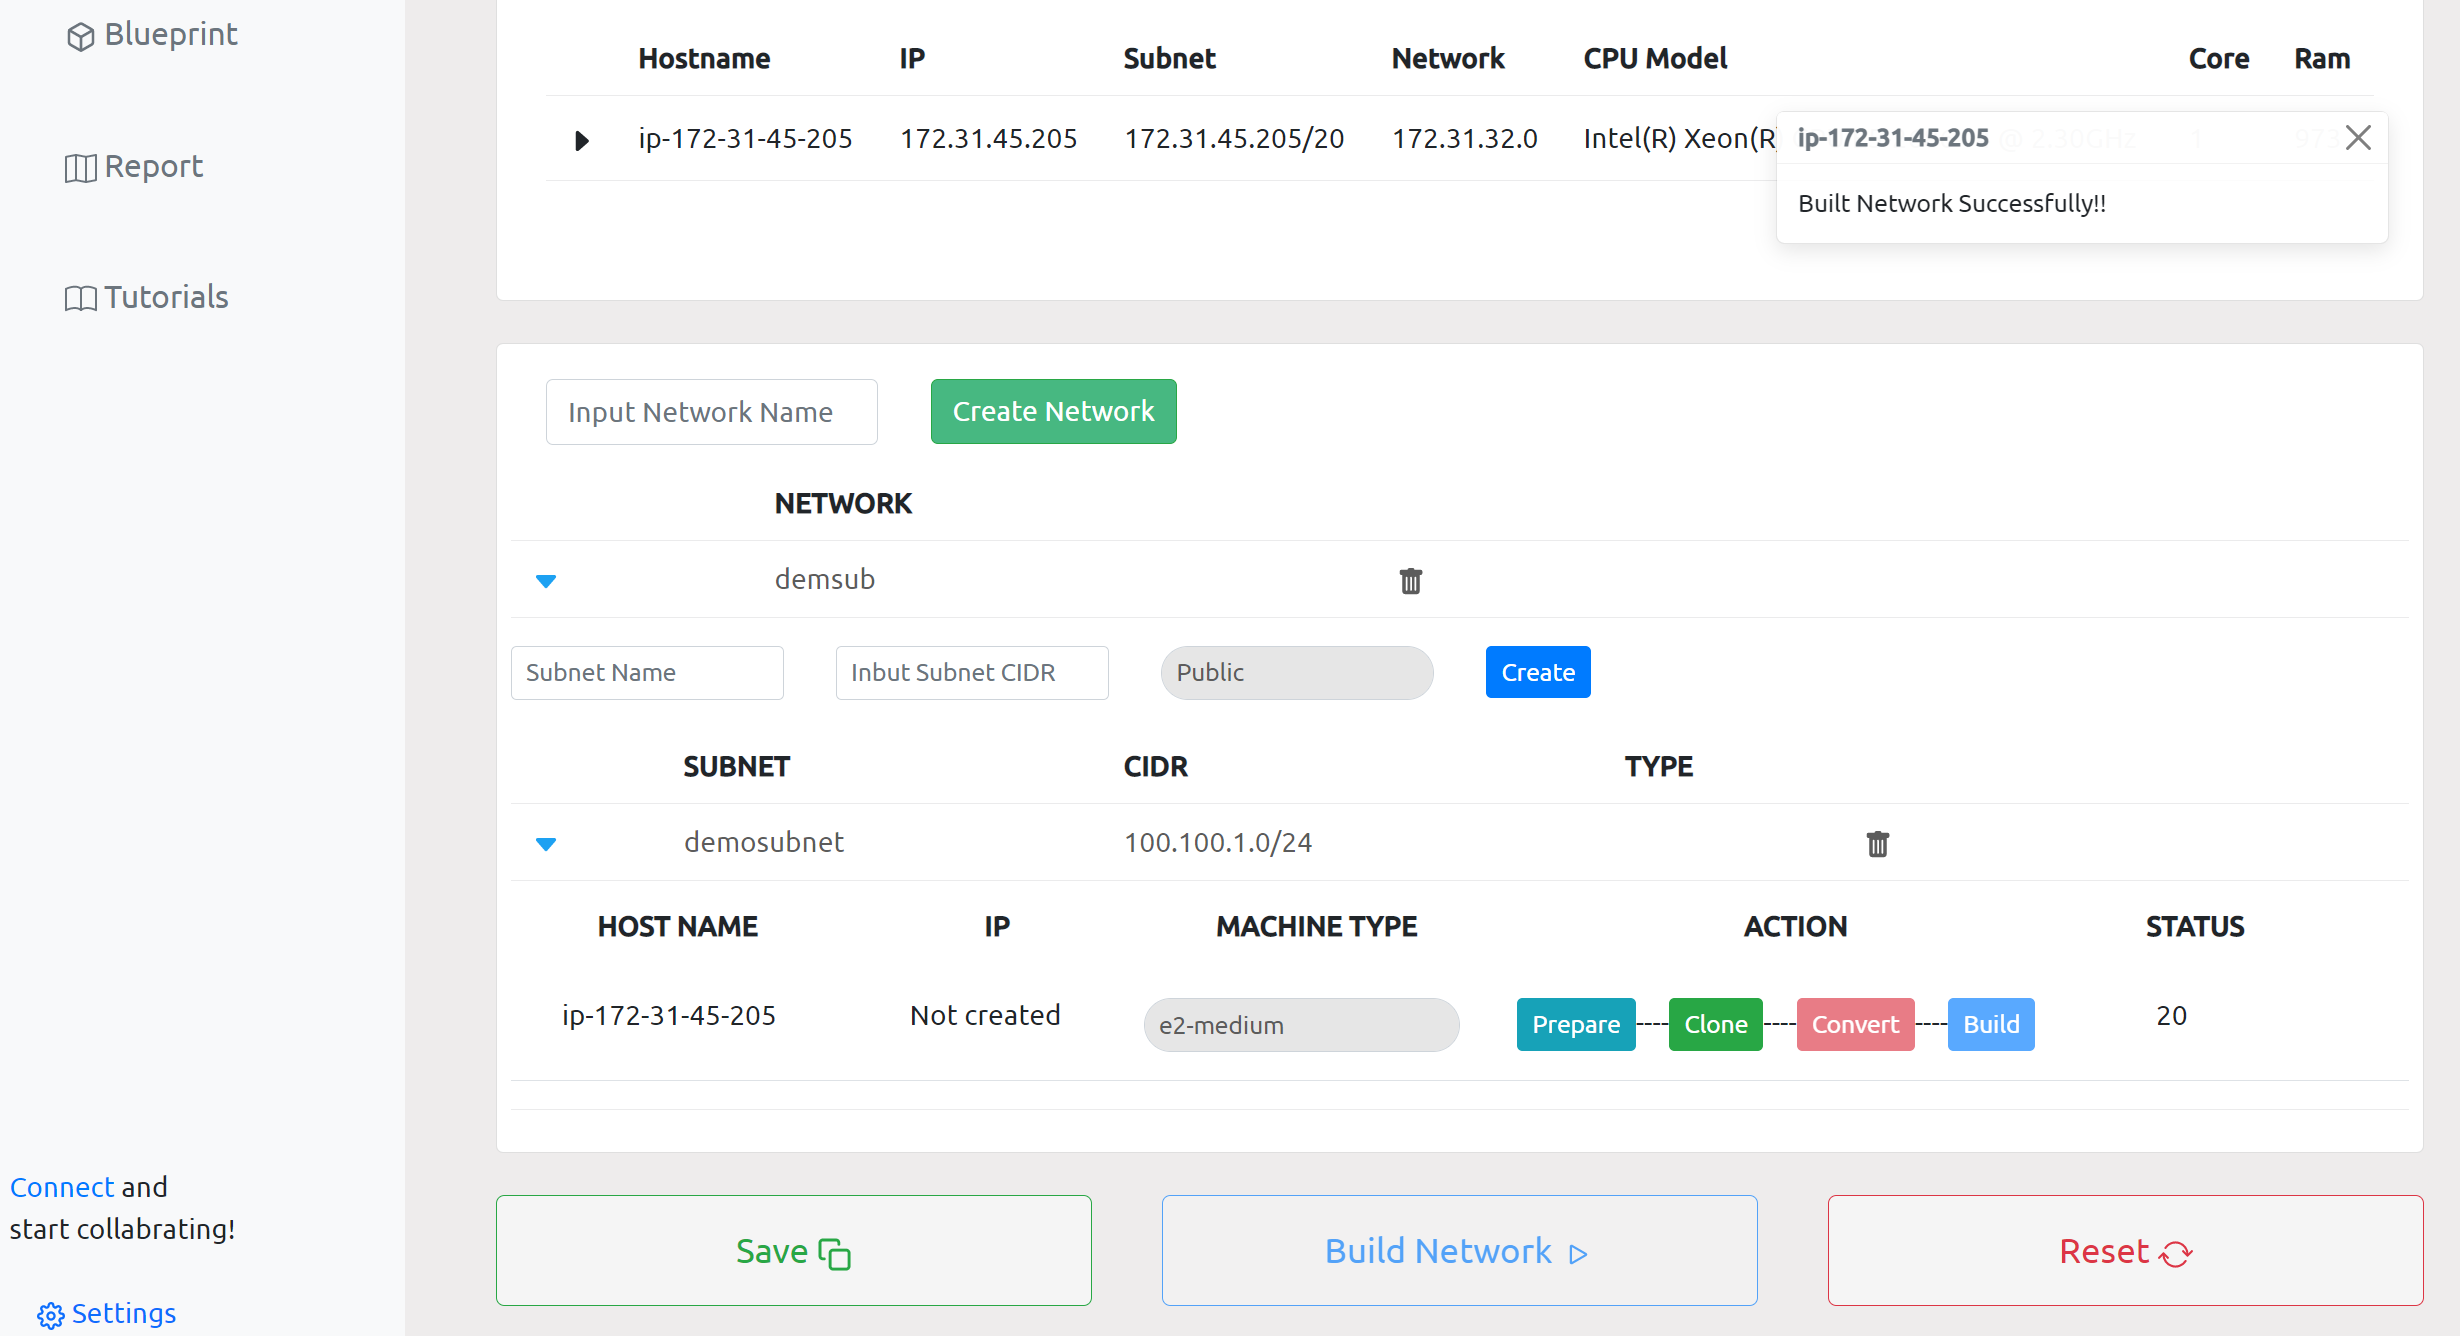
Once we create and save the blueprint we can create the necessary network resources for the migration by clicking on the build network button.
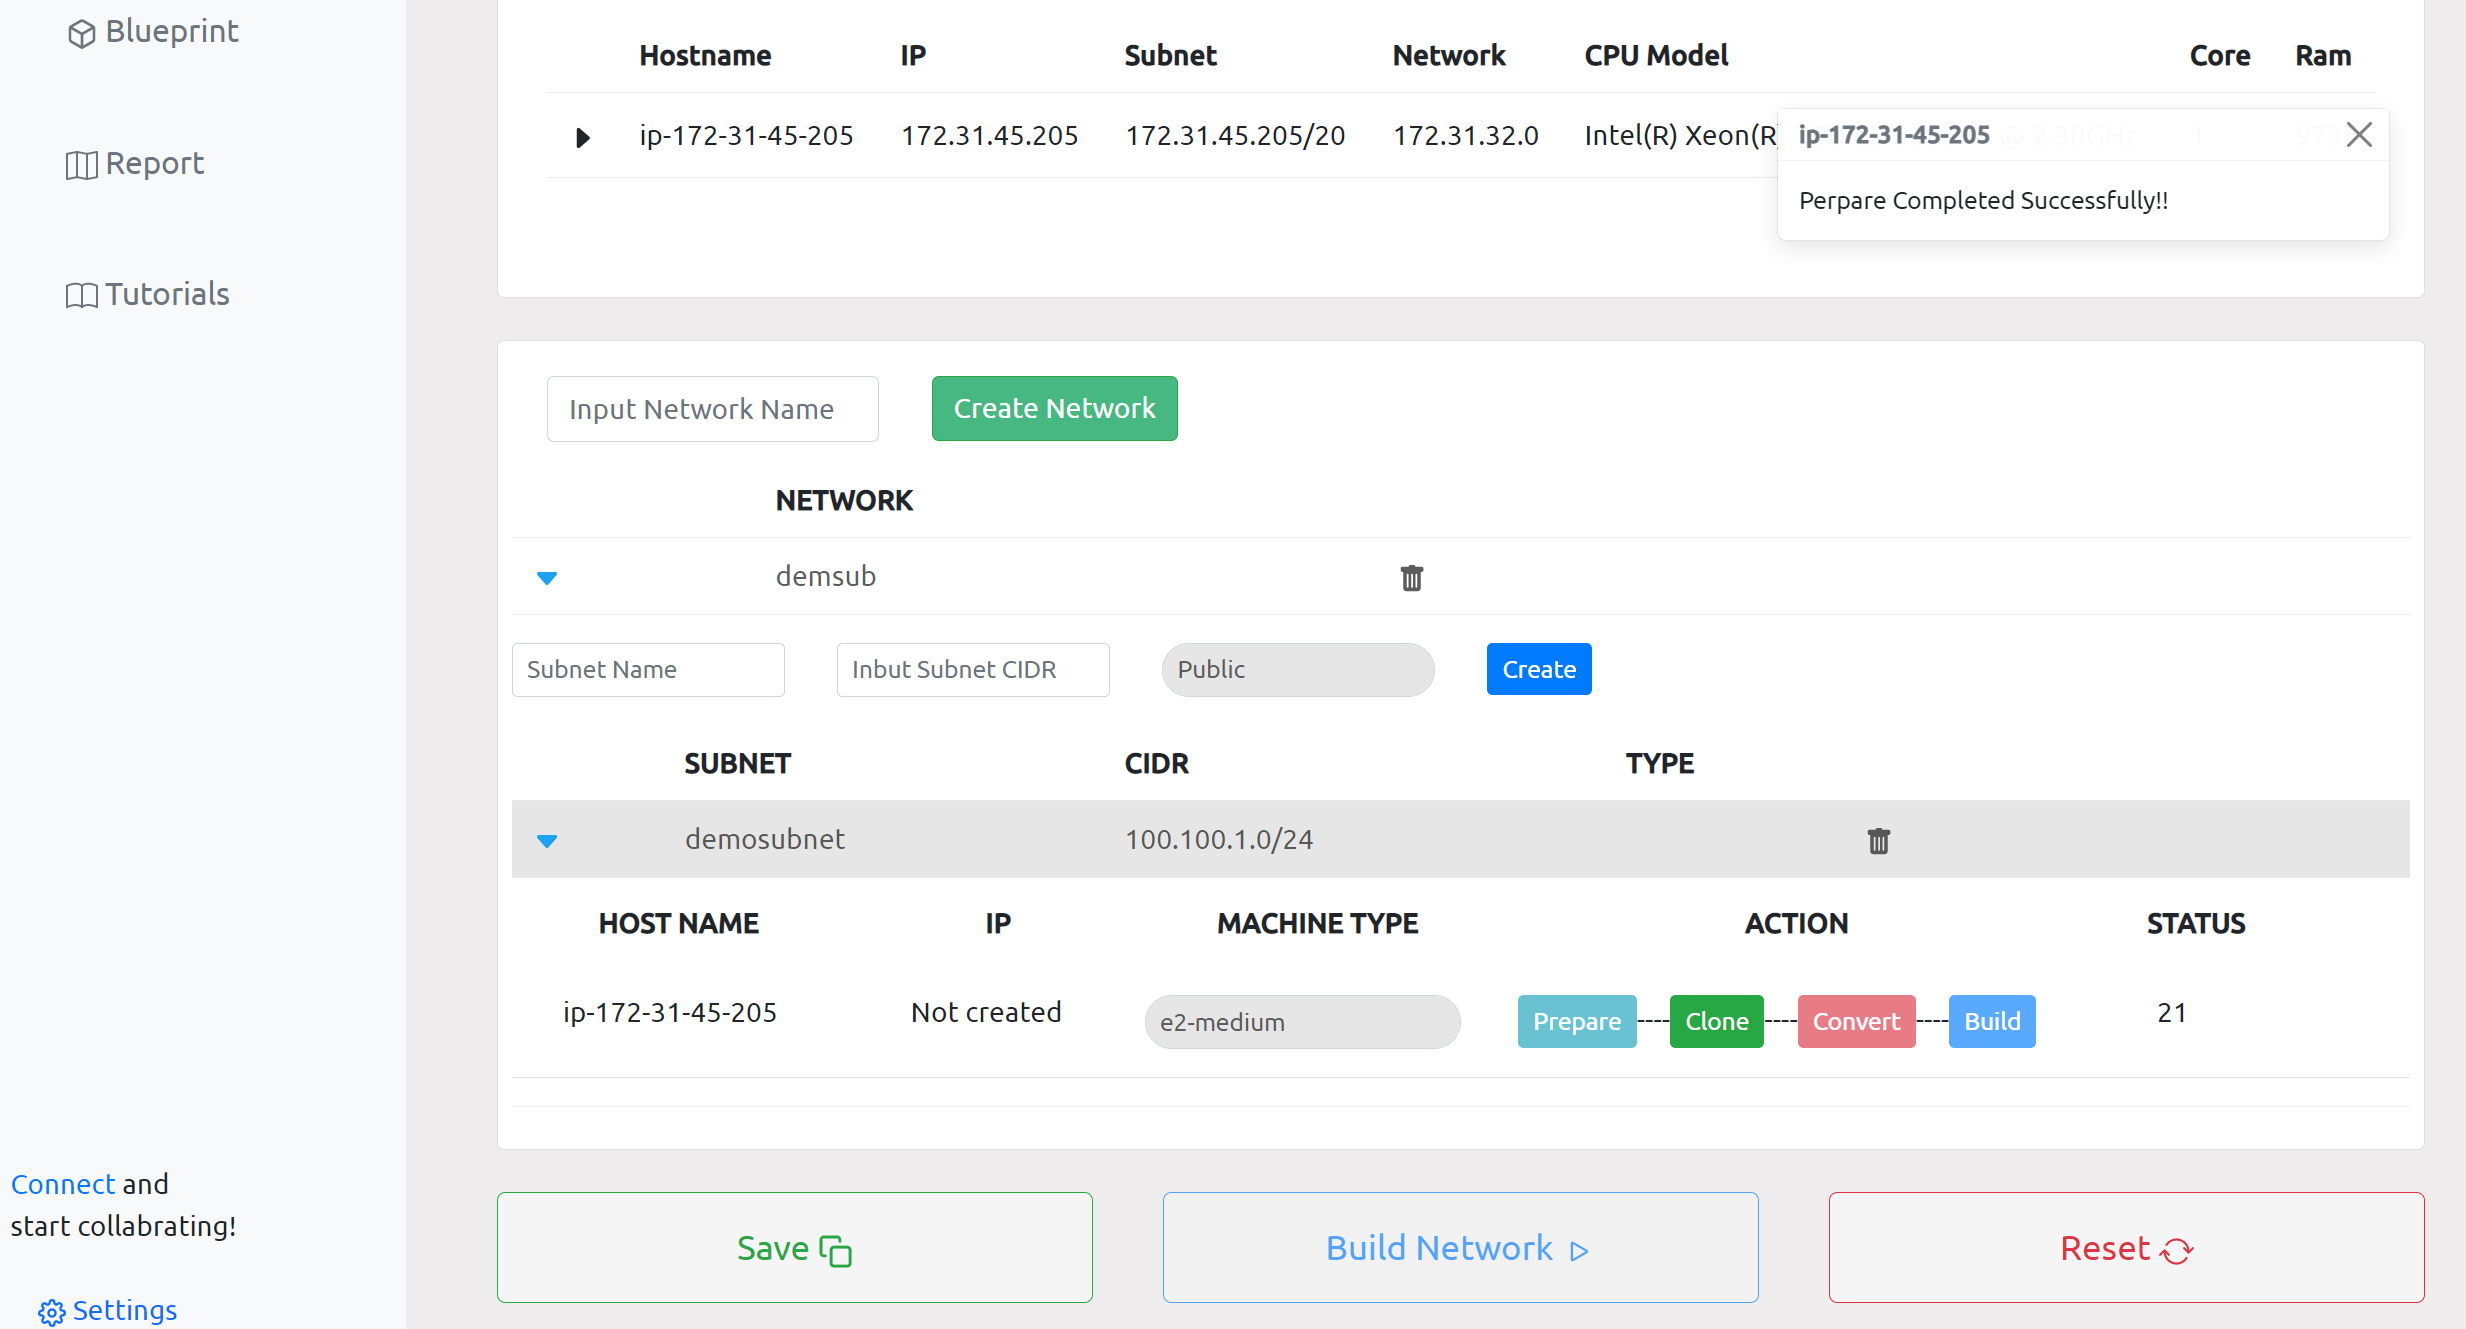
VM preparation
After we create the network resources, we prepare the target VMs to be ready for the disk cloning by installing the necessary dependencies. During this process we also make sure the configurations are in order for the upcoming stages to run smoothly.
Note
Prepare and Clone buttons are enabled simultaneously. The intention of this is to make preparation optional, but we strongly recommend to go through this step (unless already done before for the same source machines) as to avoid potential future errors.
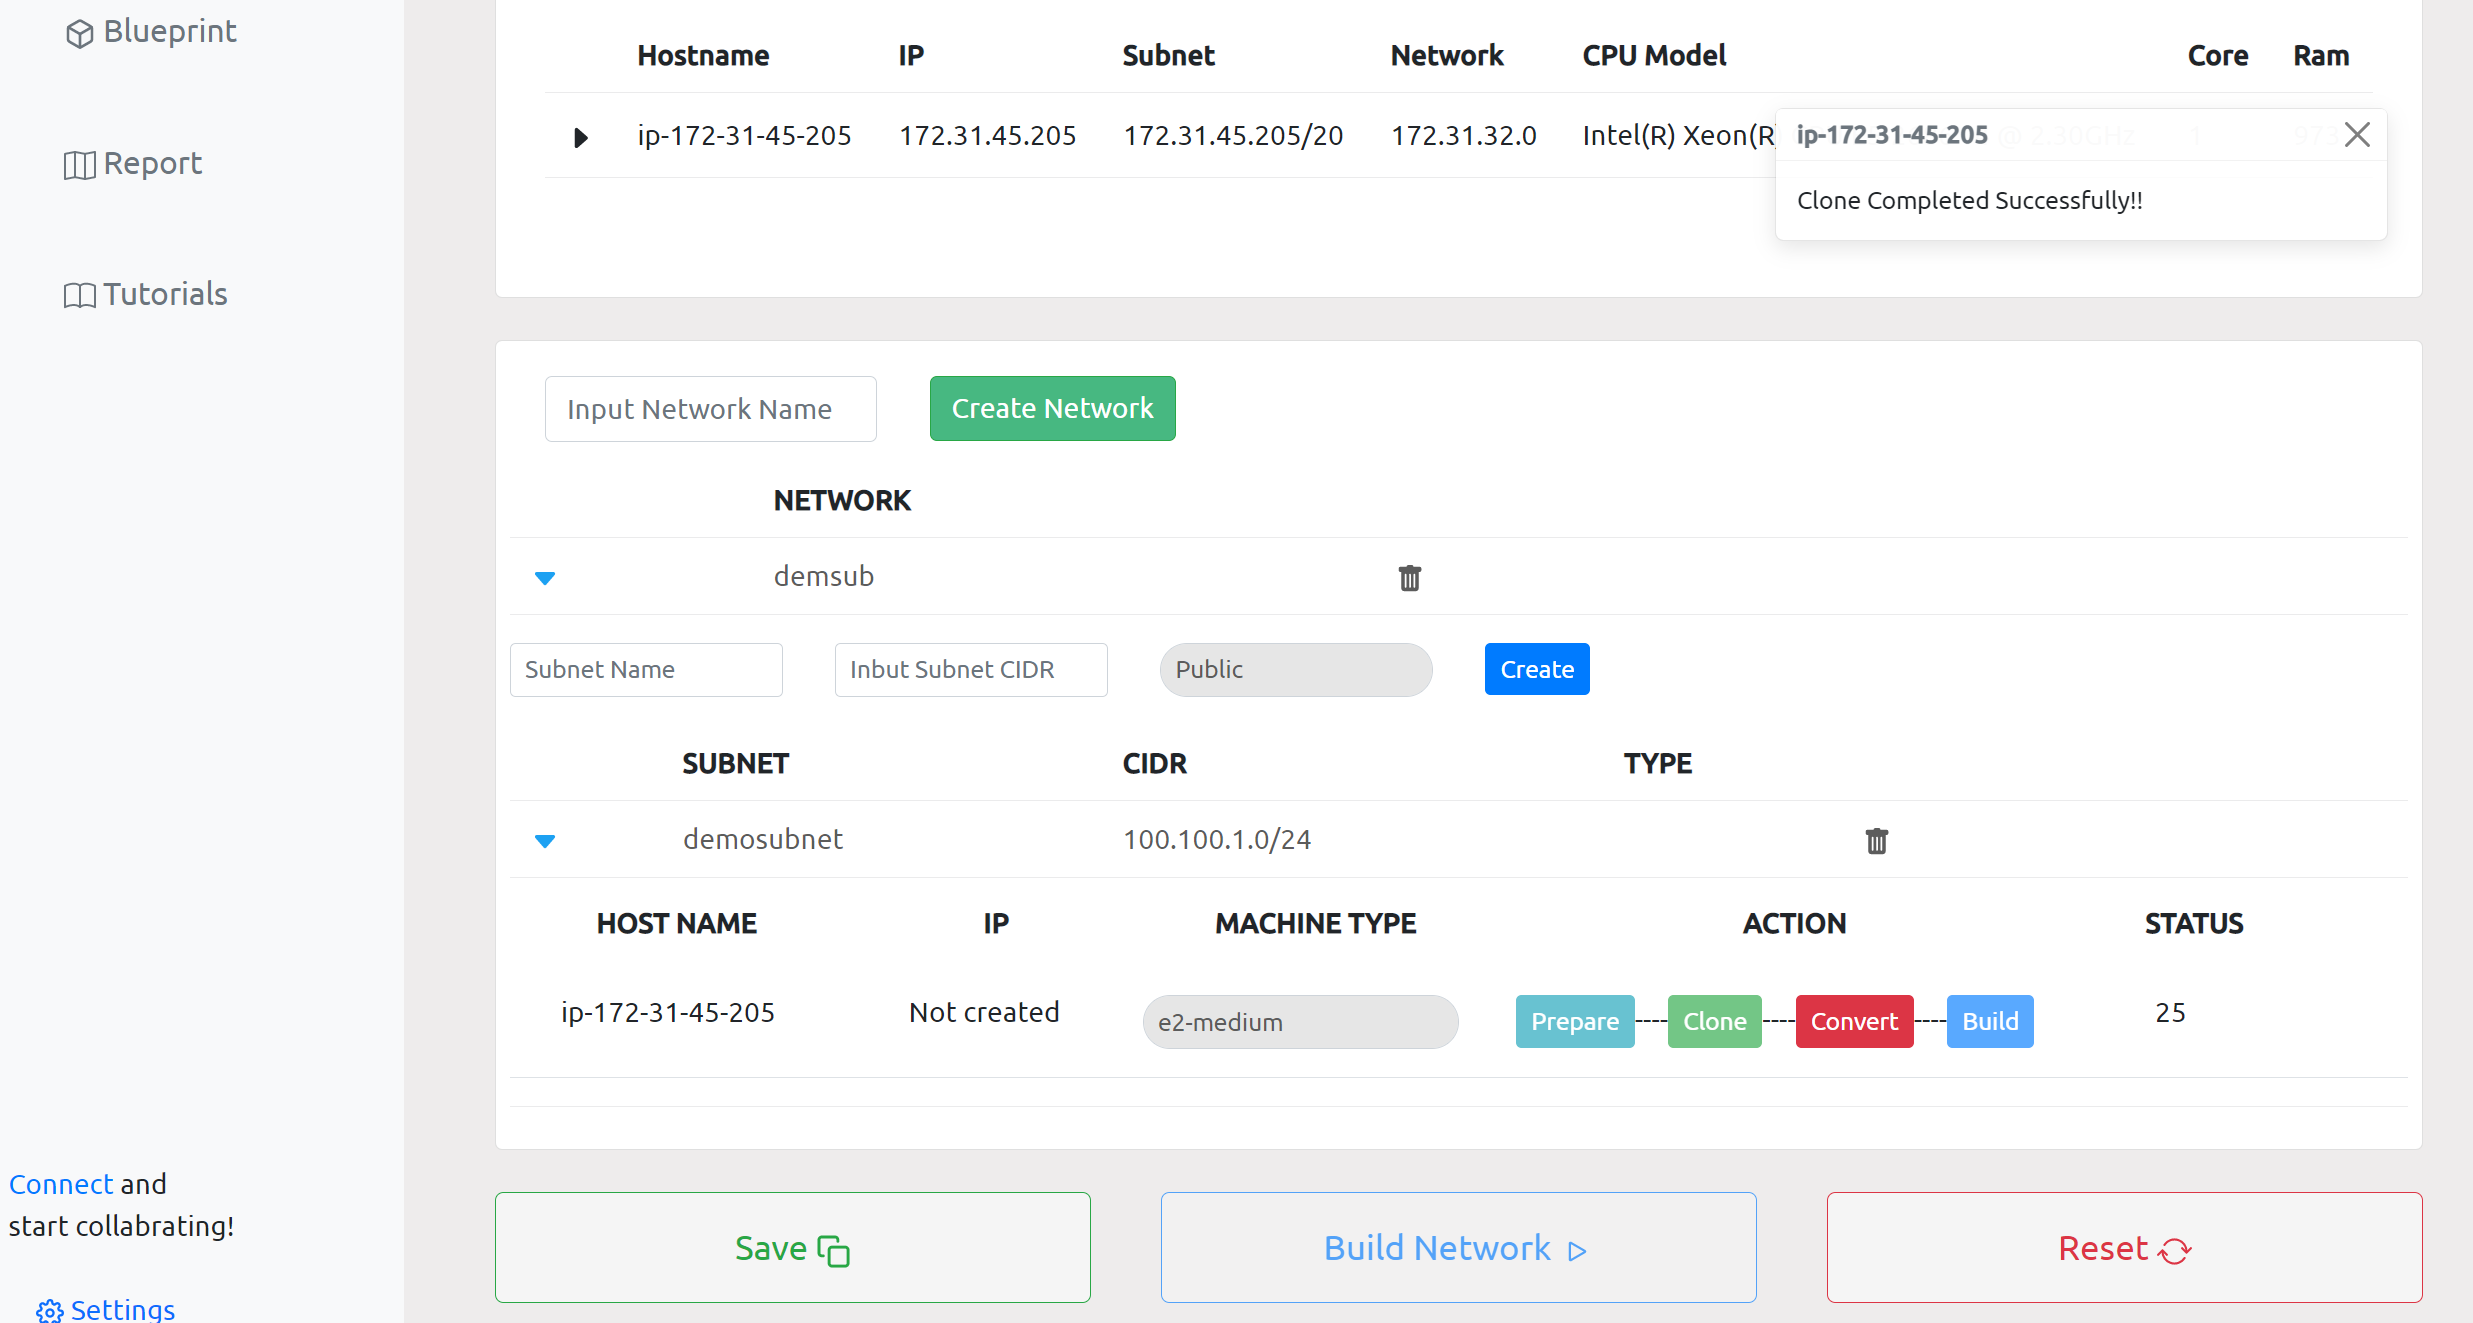
Disk cloning
The Clone button will get enabled along with the Prepare button after the network creation is completed. We can start cloning by clicking the clone button. This can be done either after completing the preparation stage or directly without going through that.
Disk data will be cloned directly to the target cloud’s object storage.
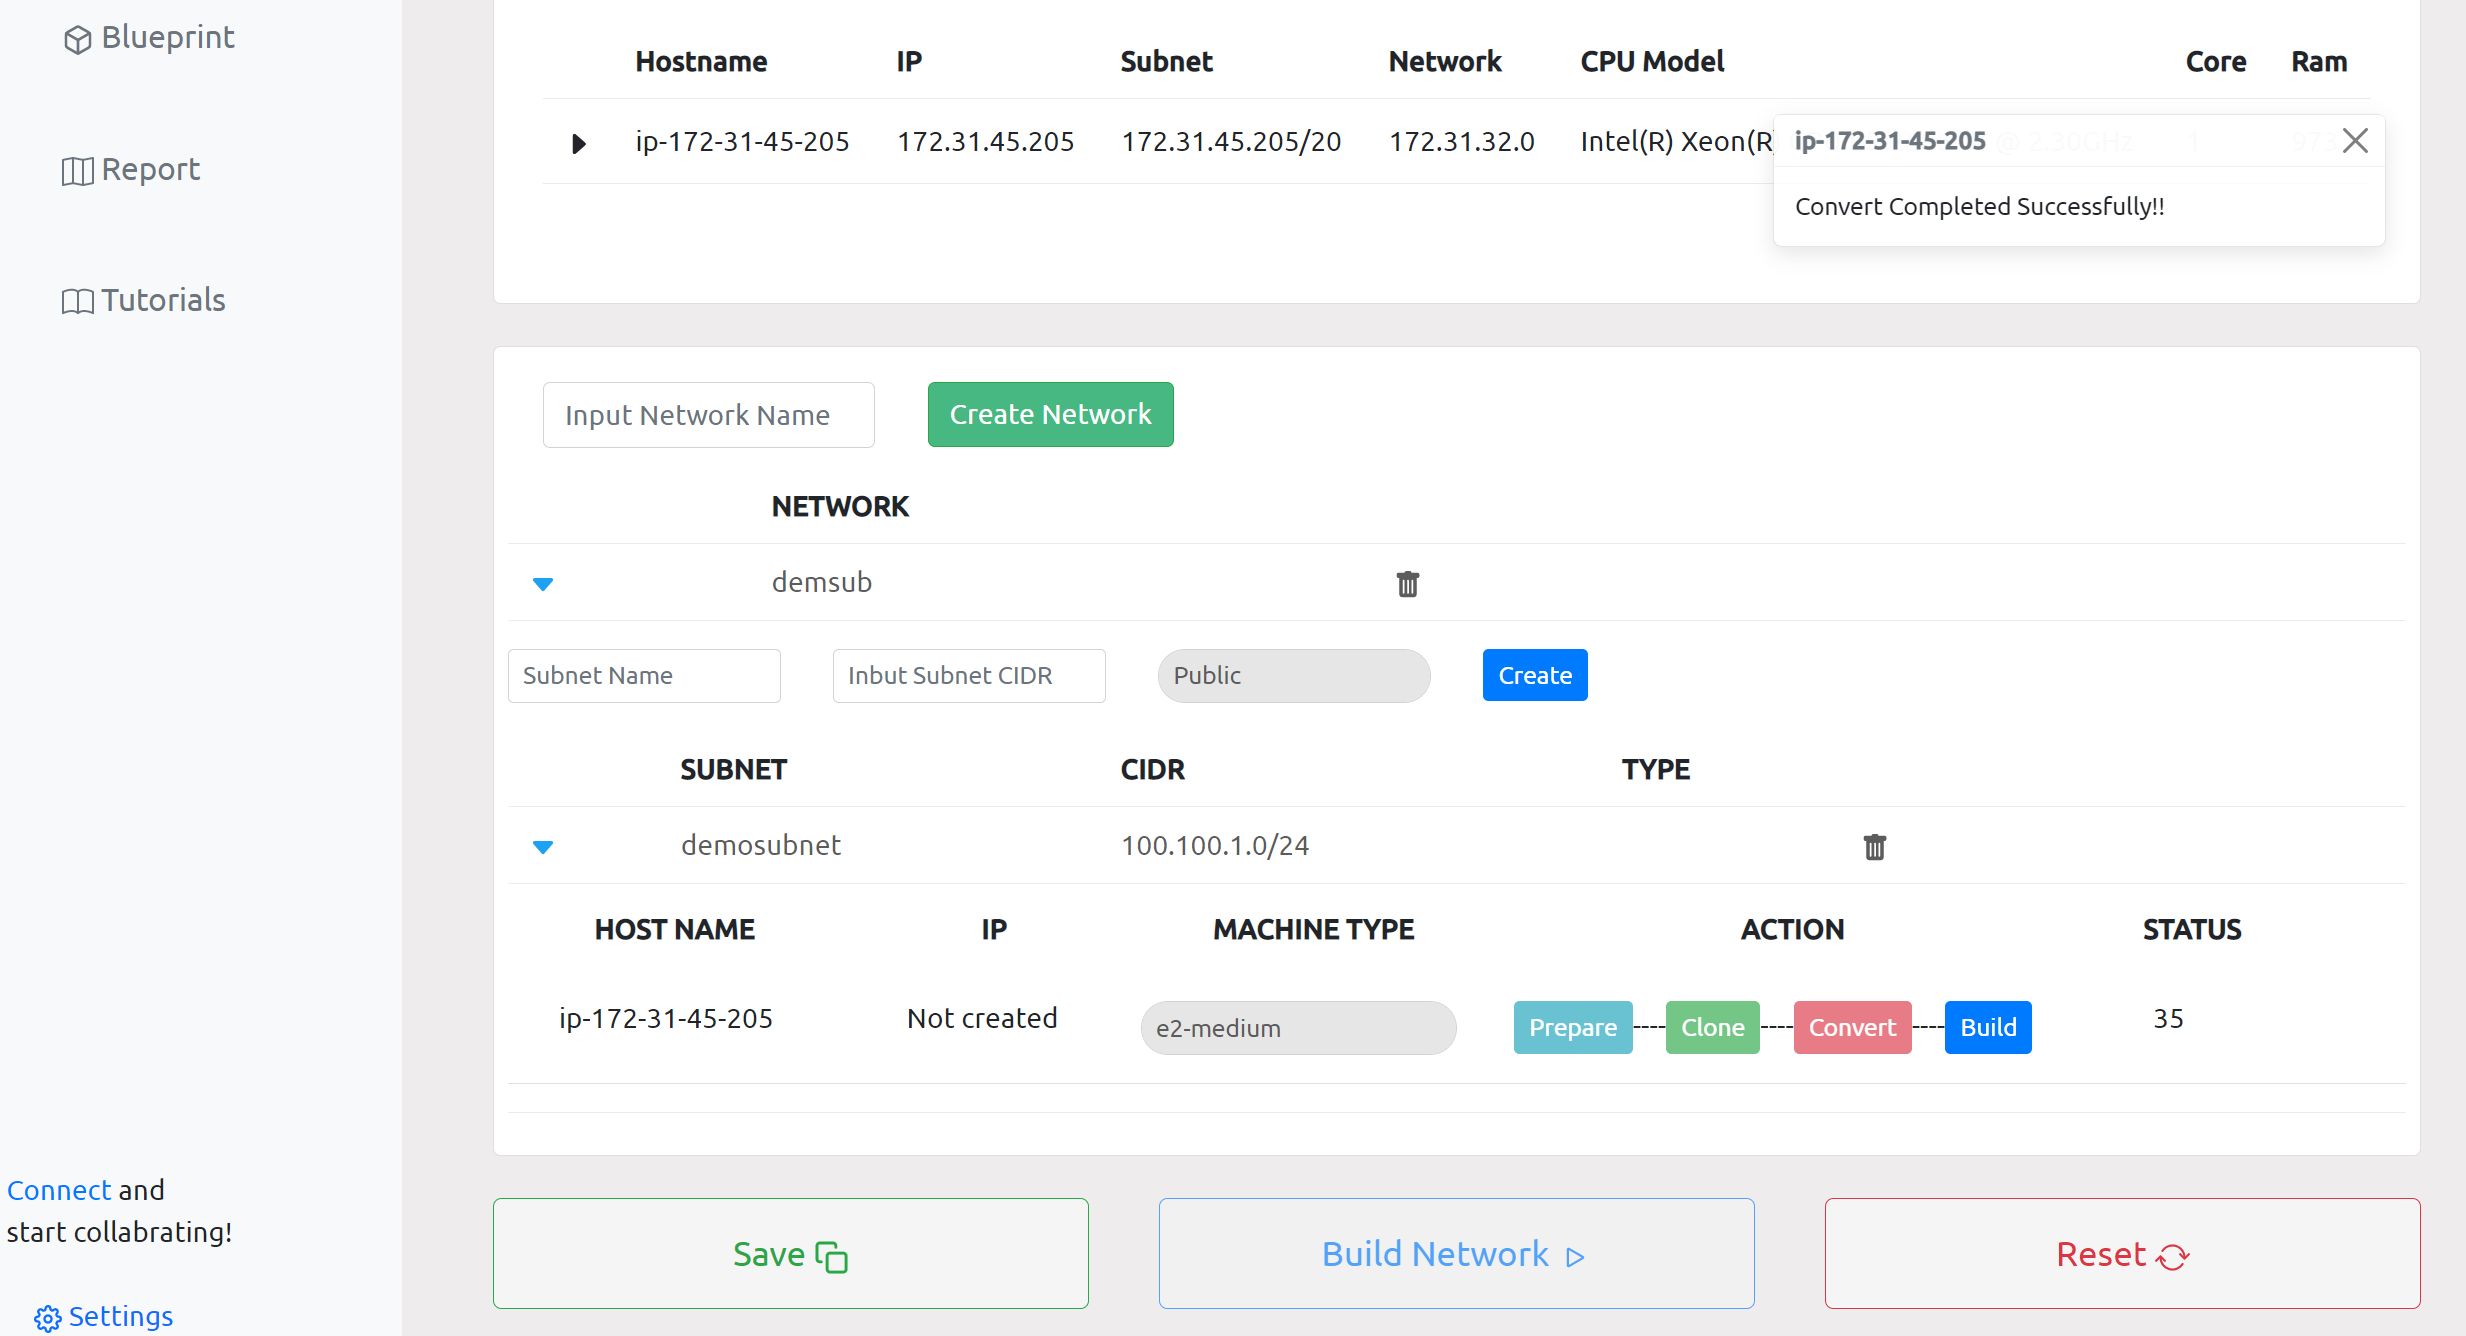
Disk conversion
We clone the disk image in raw format to the object storage. Each cloud provider needs the disk image to be in certain format. We convert the disk image into a required format in this step. Click on the convert button as it gets enabled after cloning.
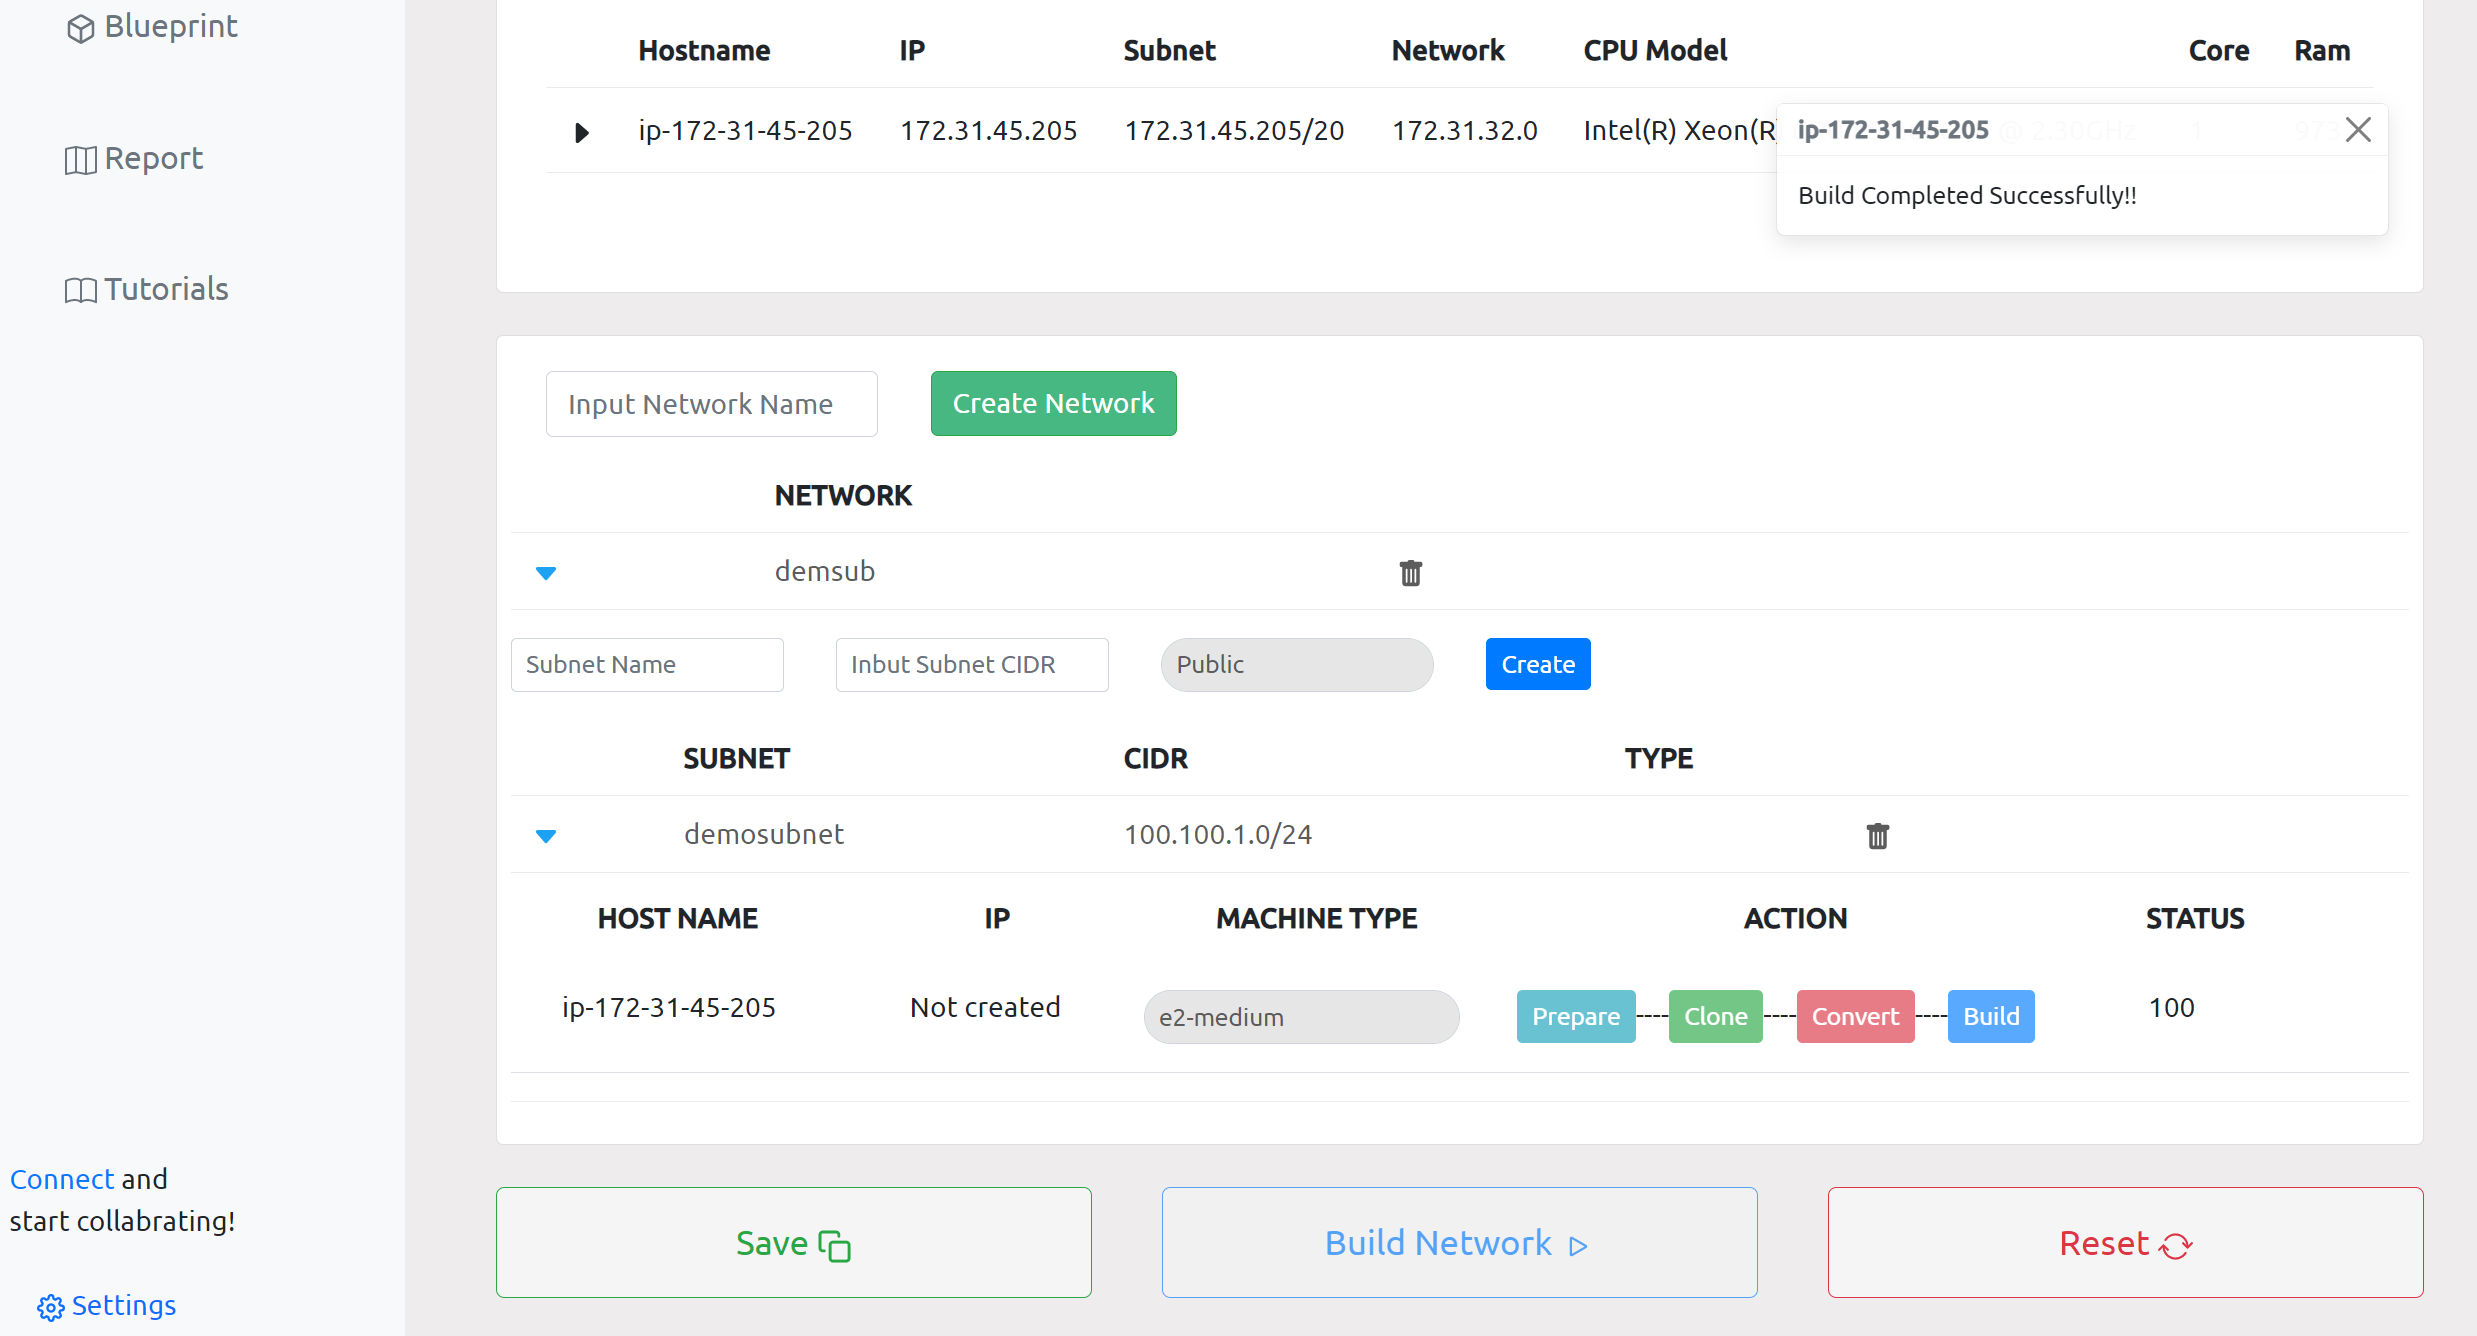
Server build in the target cloud
As the disk conversion gets completed we can click on the build button to start the server build.
The status will now get changed to 100 when the server build gets completed.